
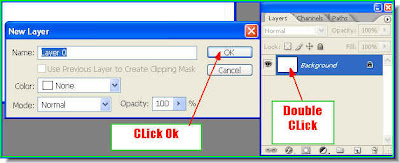
Step 2 : Double click the 'Background' in the Layers/Channels/Paths pallette. When the New Layer dialogue box appears (shown on left) click ok. Step 3 : The 'Background' changes to Layer 0 (zero). Now it is editable. A Background is not editable.
Step 4 : Click on the Text Tool to select it.
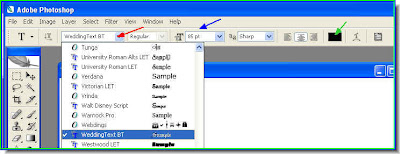
Step 5 : When you click the Text Tool look at the top panel. The red arrow points to to the fonts available. Click where it points to and you will find all the fonts installed from a drop down window. Click anyone which you like. Next notice the blue arrow it gives the size of the fonts. You can enter any value in the box to set the size. Lastly look at the green arrow. It points to a black rectangle. You can change the color of the font with it. For this tutorial I am going to leave it at the default black. Step 6 : With the Text Tool selected draw out a selection as shown above.
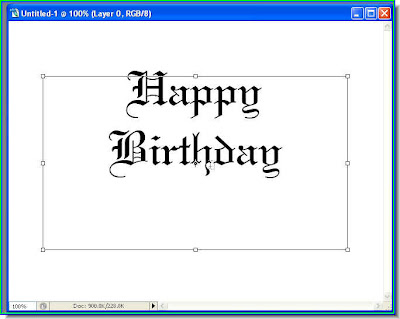
Step 7 : I have typed out the text. You can type in what you like.
Step 8 : In the Layers/Channels/Paths pallette notice that the Type layer (with the T) sits on top of Layer one which is the blank white layer.
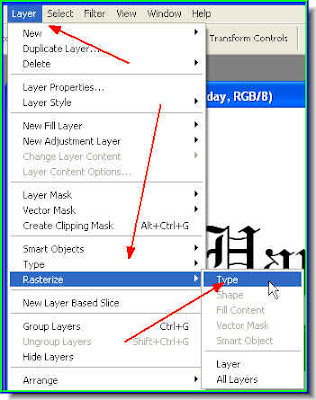
Step 9 : Go to Layer>Rasterise>Type. Step 10 : Notice that the type layer has become transparent. A Type layer cannot be edited till it is rasterised.
 Step 11 ; Now click on the layer thumbnail and CTRL+CLICK.
Step 12 : As soon as you CTRL+CLICK the layer thumbnail a election of 'marching ants' appear around the letters.
Step 13 : Now click the Gradient Tool. You can see the gradient at the top.
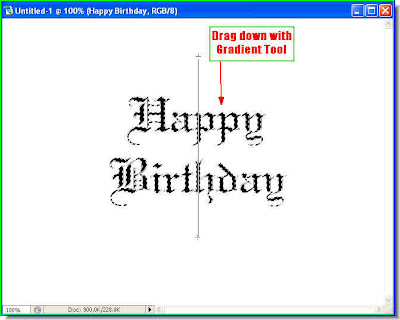
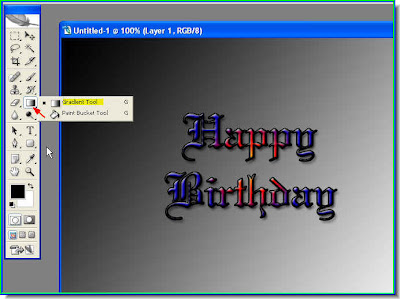
Step 14 : Now drag down from top to bottom with the Gradient Tool. You have to click to select the Gradient Tool. You will not notice much change after you apply the gradient. Step 15 : Now go to the Color/Swatches/Styles pallette and click on Styles. When it opens you can see the Style I have selected (the small white hand points to it). Click it.
 Step 16 : Now press CTRL+D on the keyboard and this is the effect you get. You can always experiment with the other styles.
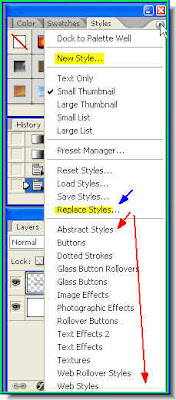 Step 17 : Now click the small black arrow at the side of Stlyes (blue arrow). From the drop down list choose Textures. And that is not the only Styles available. On the Styles pallette click where the small white arrow points to. You will many other Styles to excite your creativity. But remember to Reset the Styles once you have finished your work with them (highlighted in yellow).
 Step 18 : Now click back on Layer 0 to select.
Step 19 : Now press CTRL+SHIFT+N on your keyboard and it will make a new layer. Layer 1 is the new layer.
Step 20 : Now use the Gradient Tool to fill the layer with a gradient as shown in Steps 13 and 14. Your image will look like this.
Step 21 : Press CTRL+E on the keyboard and Layer 1 will merge wth Layer o. See above.
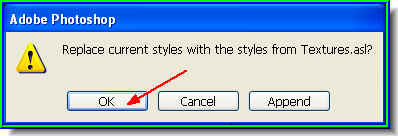
Step 22 : This dialogue box opens. Click ok.
Step 23 : Now that Styles have been replaced I have clicked on 'Nebula' It is the the one which the small white hand points to. If you hover your cursor over the Styles you will be able to read there names. Click Nebula.
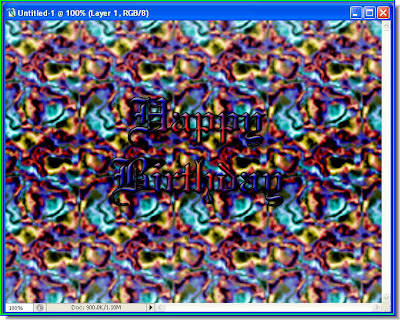
Step 24 : Look at this!! The Happy Birthday is hard to make out. We will soon fix that. Step 25 : Click on the Happy Birthday layer to select it. Then CTRL+CLICK the layer thumbnail as in Step 11 and 12. The 'marching ants' reappear around 'Happy Birthday'.
Step 26 : Now right click the 'f' icon where the red arrow points to.
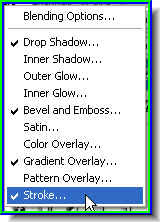
Step 27 : When you right click this popup appears. Click Stroke. Step 28 : When the Stroke Structure dialogue box opens click the the black rectangle shown it will open the Color Picker.
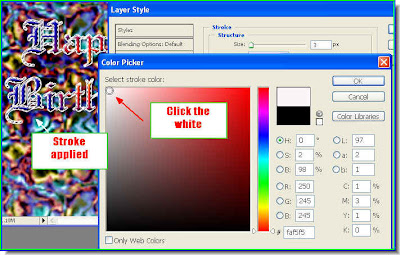
Step 29 : Click the white where the red arrow points to select white as the Strole color. You can see at left what the Stroke looks like around the letters. Click ok in the Color Picker.
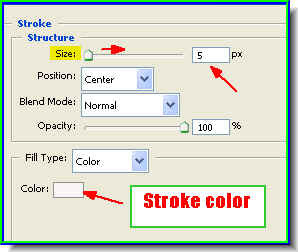
Step 30 : Drag the Size slider to set the size of the Strole. By default it is 3 pixels. Since the font that I have chosen is not thick. I am choosing 5 pixel as the Stroke size. Click ok.
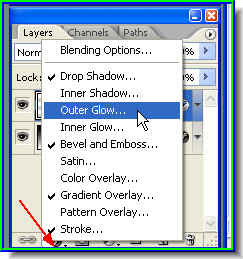
Step 31 : Again click the 'f' on the the bottom of the Layers/Channels/Paths pallete as in Steps 26 and 27. But this time choose Outer Glow.
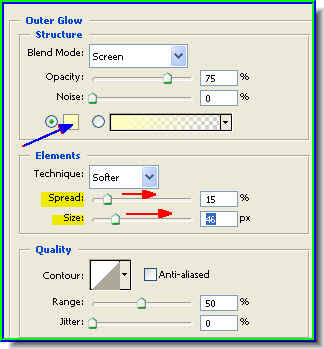
Step 32 : In the Outer Glow structure if you click the small yellow color box, it will bring up the Color Picker. You can change the color of the Outer Glow with it. But I will leave it at the default yellow. I will also drag the Size and Spread sliders in turn. Then click ok.
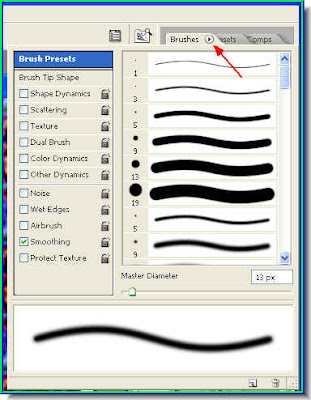
Step 34 : Now click on Brushes on the right hand top of Photoshop to see what sets are available.  Step 35 : When you click the small black arrow it opens the list of brushes available. Choose one. I have chosen one which is a free one downloaded from the internet.
 Step 36 : I have now clicked on the Brush Tool and from the dropdown at the top which I have accessed by clicking where the red arrow points to, I have chosen my brush (small white hand). It is a large brush and I will use the default size to click once on the image.
This is what it looks like after I applied the brush. That is all.
The next part of the tutorial is here.
No comments:
Post a Comment