This tutorial will teach you you to create a torrent of water like a waterfall, which you can add to an image for a special effect. 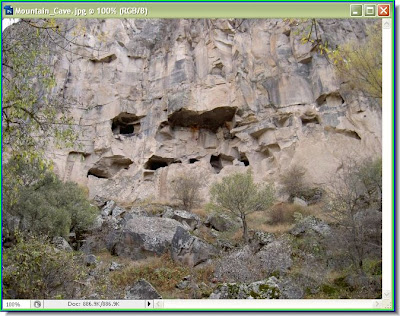

Look at the photo above. The caves are dry. I have added the waterfall with photoshop as shown in the image below.
Look at the photo above. The caves are dry. I have added the waterfall with photoshop as shown in the image below.
I have used the Pen Tool. Brush Tool and the Liquify tool for this effect. Here is the tutorial:
The latest post and other tutorials are here.

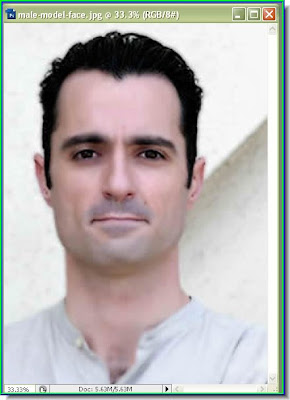
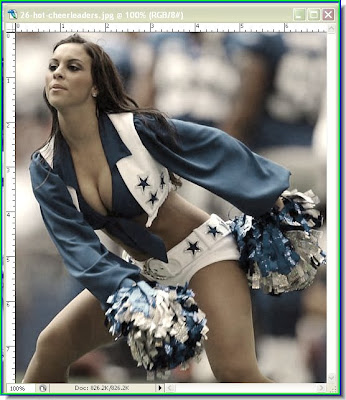
I have taken this picture.

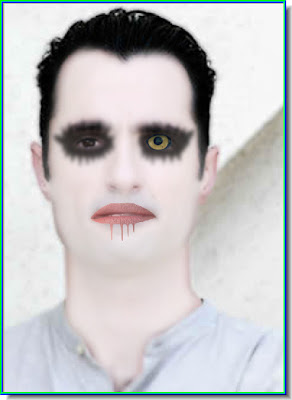
I have added the shadows cast by light shining though window blinds. It can be easily done. Here is the tutorial
The latest post and other tutorials are here.
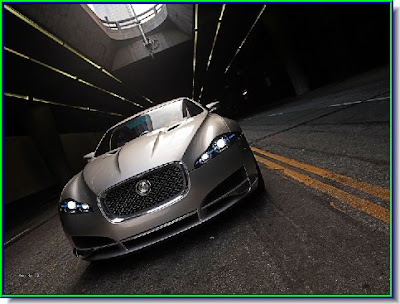

I have added the light streaks to the car. You can do it too. Here is the photoshop tutorial:


Compare the two photos. The bottom one appears to glow. The tutorial is here.


The top photo has been 'framed' in the bottom one. Here is the tutorial.
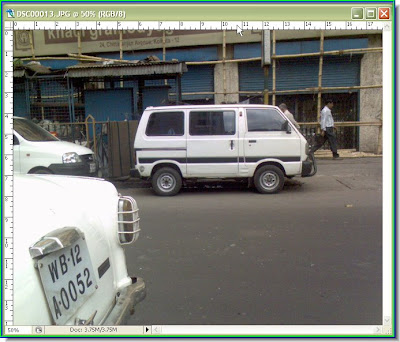
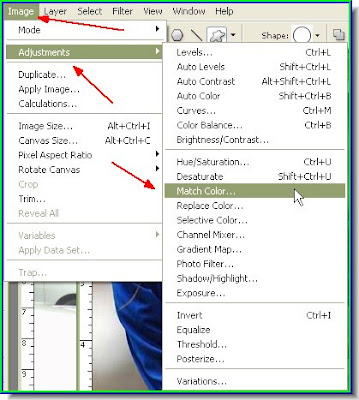
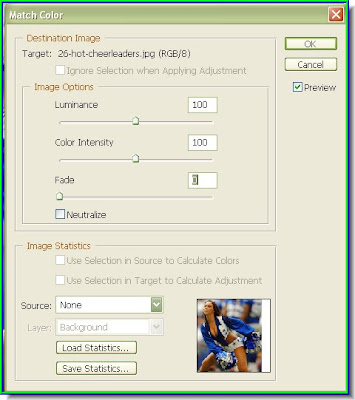
Step 2 : The Match Color dialogue box opens. Step 3 : Look at the bottom of the Match Color dialogue box. Clicking the Source reveals a drop down box. I have chosen the street image.
Step 4 : You can see that I have the street scene selected.
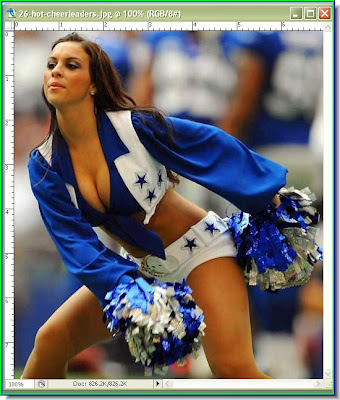
Step 5 : The colors of the cheerleader image have taken on the hue of street image. They now match. That is the objective of Match Color.
Step 6 : You will find these controls on the top of the Match Color dialogue box. I am leaving them untouched because they are not required for this image. In case the colors do not match then these controls can be used. Click ok. The Luminance is to control the brightness and the Color Intensity to fine tune the Color. After that you can Fade the color and brightness. You have an added option by checking the Neutralise check box and moving the Fade control.

Step 7 : Use the Pen Tool (Tutorial on using the Pen Tool is here) or the Lasso tools to make a selection and delete the background.
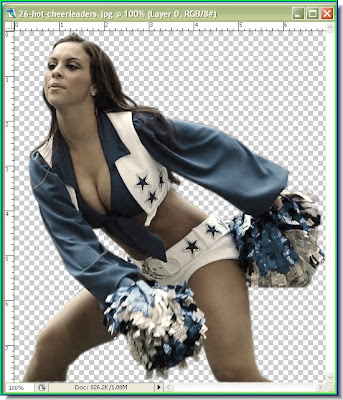
Step 8 : I have got rid of the background. Step 9 : Now I am dragging the cheerleader photo onto the street scene with the Move Tool. I am keeoing the SHIFT pressed to make it land exactly in the middle of the street scene.
 The Move Tool.
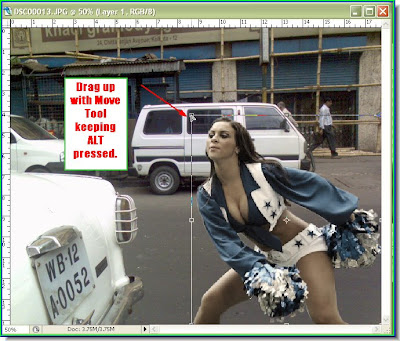
Step 11 : I have dragged the cheerleader into the bottom left corner. Then keeping ALT pressed I have resized the image to make it bigger proportionately. Step 12 : Since I have transformed i.e. resized the image I will have to apply the transformation. This can be done by clicking the Move tool or any other tool on the left panel. The Apply the Transformation dialogue box opens. Click Apply.
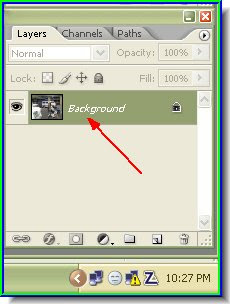
Step 13 : Look at the Layers/Channels/Paths pallette. The cheerleader's layer is above the street scene i.e. the Background.

Step 14 : Go to Layer>Flatten image.
Step 15 : Notice that the two layers have now become a single layer i.e. the Background. Step 16 : Go to Layer>Adjustment Layer>Levels.
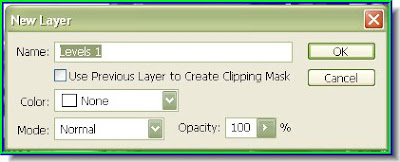
Step 17 : The New Layer dialogue box opens. Click ok.
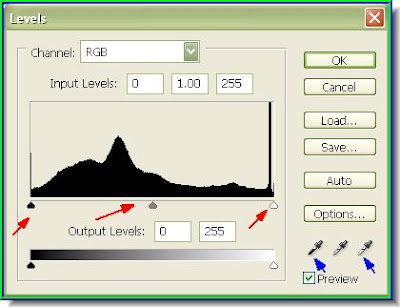
Step 18 : The Levels dialogue box opens. Note the Black, Grey and White sliders (red arrows). Also note the Set Black point and Set White point (shaped like eye droppers).
Step 19 : I have clicked on a dark area of the image with the Black eyedropper. Click ok in the Levels dialgue box. If you are not happy with the result go to Edit>Undo to undo it. Then click again at another dark area of the image. Click ok.

The image has better contrast now.
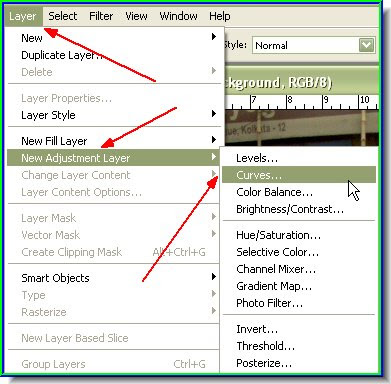
Step 20 : Go to Layer>Adjustment Layer>Curves. Step 21 : This dialogue box opens. Check the 'Use Previous Layer to Create Clipping Mask'. Click Ok.
 Step 22 : The Curves dialogue box opens. Select the Blue Channel from the drop down. Do not click ok.
 Step 23 : Drag the diagonal up slightly.
 Step 24 : Now choose the Red channel and drag the diagonal slightly up. Click ok
 The REd and Blue tones have been heightened and look believable. That is all.
Now to show you how to make a selection with the Lasso Tool. I have chosen the same picture.
Step 1 : Select the Magnetic Lasso Tool.

Step 2 : Click on the Magnetic Lasso to select it and then click all around the object you wish to select. You can see the Magnetic Lasso and also the first point I clicked. If you click a point wrongly, hit delete. It will delete the last point only. Then continue as before.
 The car has been selected.
Step 3 : Onthe top panel set the Feather to at least 1 pixel or two. Make sure that Anti-Alias is checked.
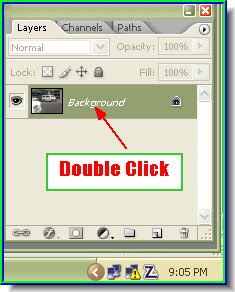
Step 4 : In the Layers/Channels/Paths pallette, double click the 'Background'.
Step 5 : The New Layer dialogue box opens. Click ok.
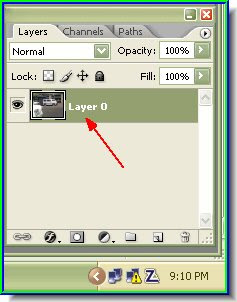
Step 6 : The Background has now changed to Layer 0.
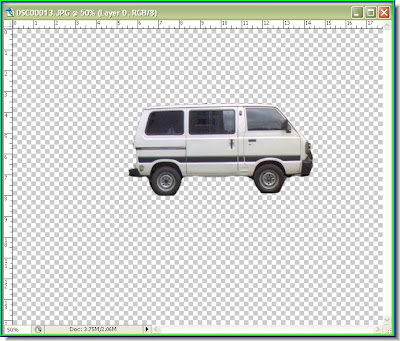
Press DELETE on the keyboard. The background will be deleted. Press CTRL+D and it will delect the 'running ants'. That is all.