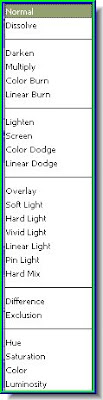
These are the Blend Modes found in Photoshop. Let us take a closer look. These four Blend Modes are to use to darken.
 These four coming next are used to Lighten.
  These seven coming next are for increasing Contrast. Each one both darkens and lightens the image, boosting contrast. Note: You will not find Hard Mix in Photoshop 7. It is found in Photoshop CS 2. But Hard Mix is rarely used.
These two Blend Modes are for comparing pixels between layers and are rarely used.

These four coming next have something to do with either the color or luminosity (lightness) values in the layer.
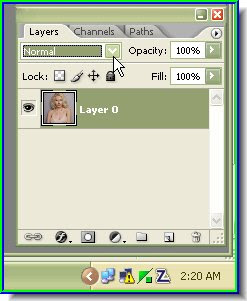
Right at the top you will find These two. Normal is the default Blend Mode. Dissolve is rarely used.
 Step 1 : Now look at this image. It looks washed out and drab. Let us use the Blend Modes to correct it.

Step 2 : Click the New Fill or Adjustment Layer button.
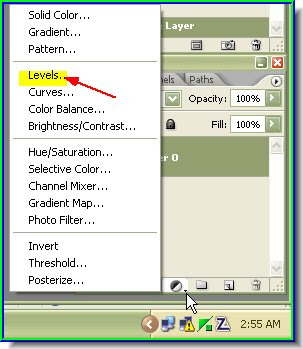
Step 3 : From the pop up click on Levels. Step 4 : The Level dialogue box pops up. Just click ok without changing any of the settings.
Step 5 : You will find the New Adjustment Layer above the photo of the girl.
 Step 6 : Change the Blend Mode to Multiply.
Step 7 : Look at the dramatic change in the image.

Step 8 : Press CTRL+J on the keyboard and the Levels 1 is duplicated as Levels 1 copy.

Step 9 : The image becomes very dark.

Step 10 : Reduce the Opacity of Levels 1 Copy to 60 %.

Step 11 : The image is still dark, but less dark.
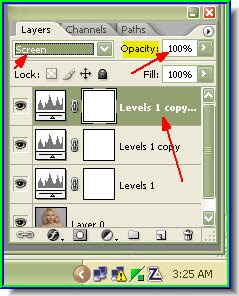
Step 12 : Press CTRL+J on the keyboard and Layer 1 Copy 1 forms. Change the Blend Mode to Screen and Opacity to 100 %.
Step 13 : The picture has lightened, but it is no longer drab.
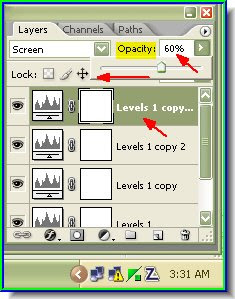
Step 14 : Now press CTRL+J on the keyboard. It forms Levels Copy 2. Lower the Opacity 60 %.

Here is the finished image. Conpare it with the one I began with. That is all for now.
The next part of the tutorial is here.
No comments:
Post a Comment