
 Restore old photos that have yellowed with time as in the top photo. Remaove the ugly yellow stains with this tutorial. Click here. Restore old photos that have yellowed with time as in the top photo. Remaove the ugly yellow stains with this tutorial. Click here.
 This is a tutorial on changing heads.
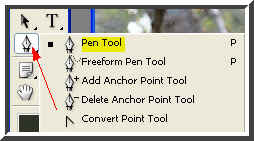
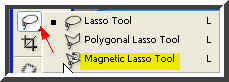 Step 2 : You can use either the Pen Tool or the Magnetic Lasso to make a selection.
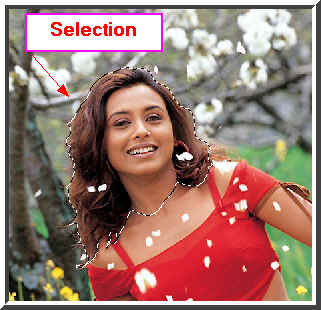
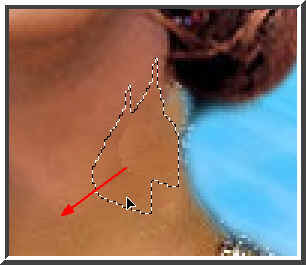
Step 3 : I have made the selection using the Pen Tool because you can very precise with it.
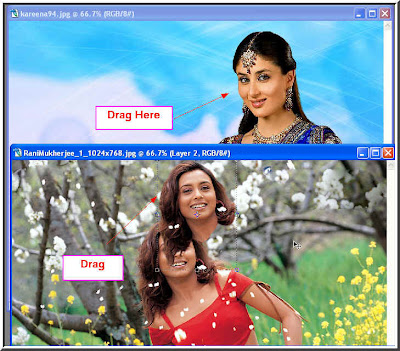
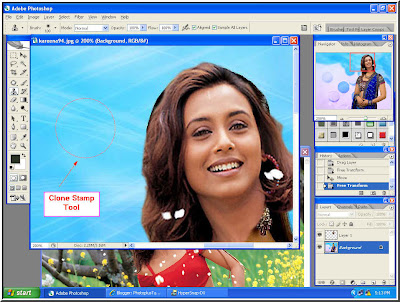
Step 4 : Now I have begun dragging the head from the bottom picture to the top one.
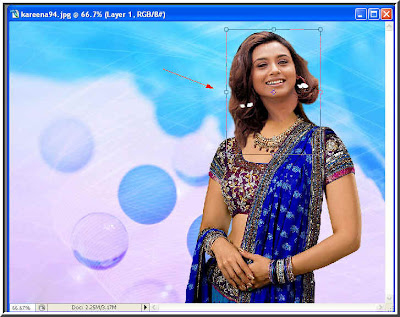
Step 5 : I have roughly positioned the head on the other image.
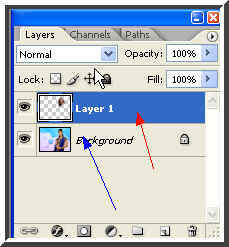
Step 6 : Note that Layer 1 (red arrow) is the head and Backround (blue arrow) is the image on which the head has been dragged to.
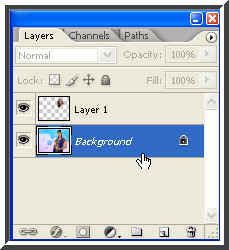
Step 7 : Click on the Background layer to select it.

Step 8 : Click the Clone Stamp Tool to select it.
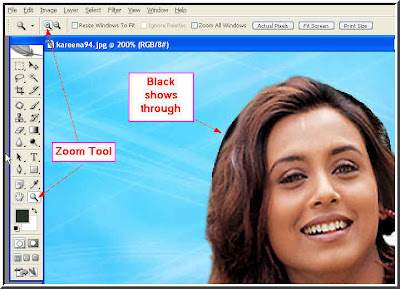
Step 9 : Click on the Zoom Tool and zoom into the image. Notice that some of the black of the picture at the bottom is visible.
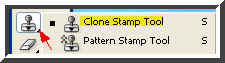
Step 10 : Click the Clone Stamp Tool to select is.
Step 11 : You can make the Clone Stamp Tool large or small using the bracket keys on your keyboard. Use this ] to make the tool tip bigger and this [ to make it smaller.
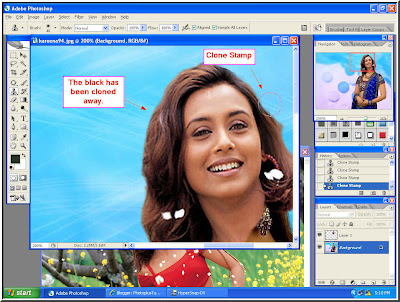
Step 12 : Note that black has been cloned away. ALT+CLICK to select the area from which to clone. Here I have used the blue in the background to clone away the black hair showing behind.Notice that I have also decreased the tool tip as I work on the left of the image.
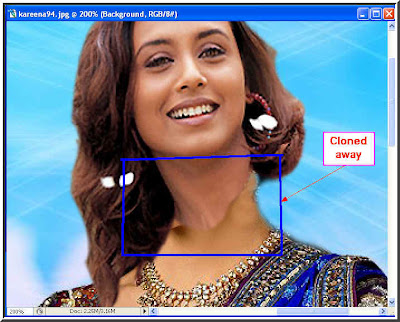
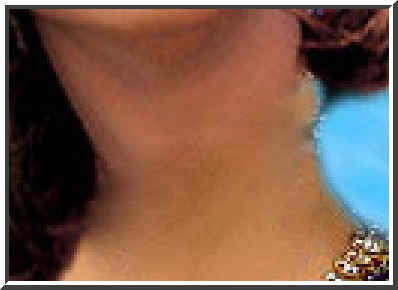
Step 13 : The area at the right of the neck has been cloned away. But look at the area bounded by the blue square. Notice that the neck does not match the neck on the one below.
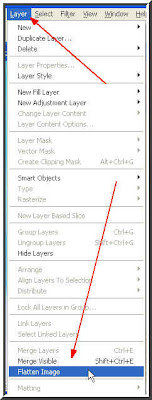
Step 14 : To fix the problem go to Layer>Flatten Image.
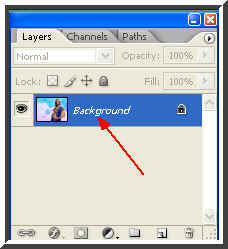
Step 15 : Notice after flattening the image there is only one layer i.e. the Background.
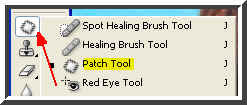
Step 16 : There is a new tool in Photoshop CS 2 called the Patch Tool. Click to select it.
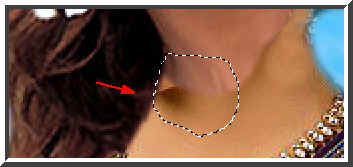
Step 17 : I have drawn a selection with the Patch Tool. Now place the Patch Tool inside the selection and drag down or up or sideways. Here I will drag it downwards.
Step 18 : Place the Patch Tool in the middle of the selection and drag down.
Step 19 : Note that the neck area has blended seamlesly. But the right side has to be fixed. CLick the Clone Stamp Tool.
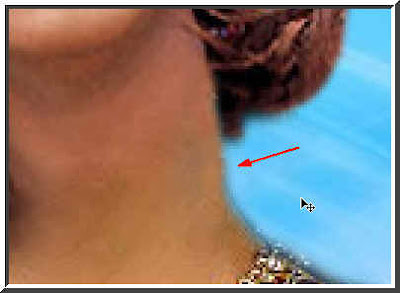 Step 20 : ALT+Click with the Clone Stamp Tool and the disfiguration at the left is cloned away. But the hair still preents a problem. Turn to the Clone Stamp Tool again.
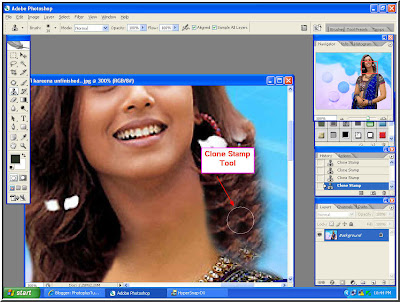
Step 21 : Now I have used the Clone Tool on the hair by pressing ALT+Click.
And, here is the finished image. Easy was it not?
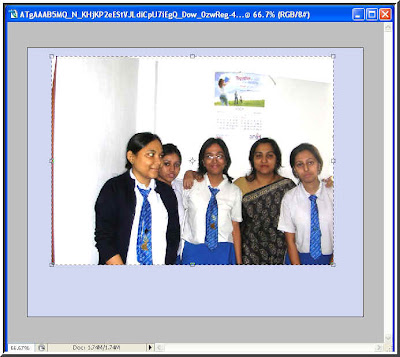
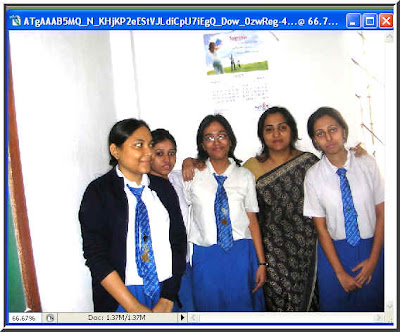 Step 1 : I have opened this photo of my daughter, her friends and teacher in class. You can see that the picture is crooked. That can be corrected using the Measure Tool and Crop Tool.
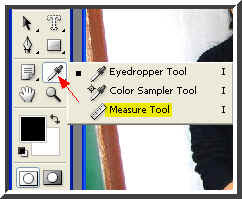 Step 2 : Click the Eyedropper Tool on the left panel in Photoshop. It reveals the Measure Tool (highlighted in yellow). Click to select it.
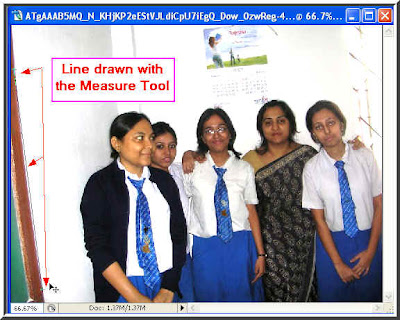 Step 3 : With the Measure Tool selected I have chosen the part of the board at extreme right and drawn a line. You can draw from top to bottom or bottom to top. It does not matter.
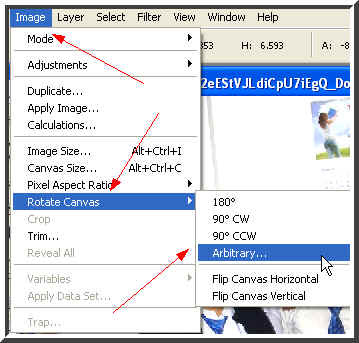 Step 4 : Go to Image>Rotate Canvas>Arbitary
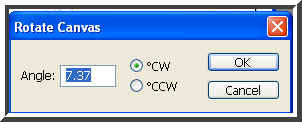 Step 5 : Immediately this popup appears. You do not have to do anything. This is calculated by Photoshop. Click ok.
Step 6 : The photo's tilt has been corrected. But the problem is the white edges at the sides. For this the Crop Tool is necessary.
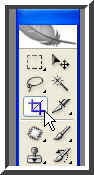 Step 7 : Click the Crop Tool from the left panel.
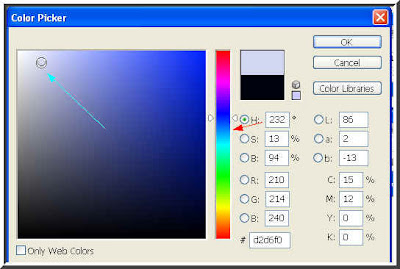
Step 9 : As soon as you click on the little black box the Color Picker appears. I have chosen blue from the Spectrum (red arrow) in the middle and clicked a shade with the cursor at the large box on the left (light blue arrow). Click ok in the Color Picker.
Step 10 : Note that the area outside the crop has changed to a light blue color.
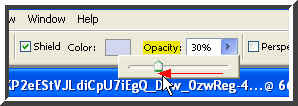
Step 11 : Now again go to the top panel and reduce the Opacity by dragging the slider to the left. I have reduced the opacity to 30 %.
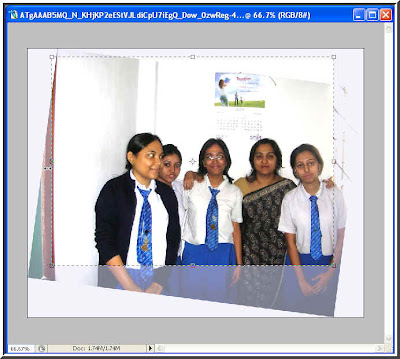
Step 12 : Now you see that the area outside the crop is visible.
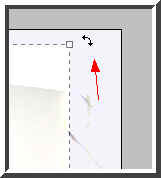
Step 13 : Hover the curson near a corner of the crop and a small double headed bent arrow appears.
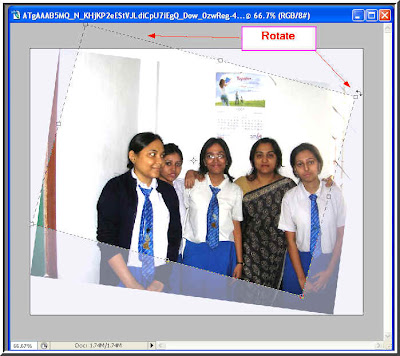
Step 14 : Use the bent arrow to rotate the area of selection. Step 15 : Resize the selection by dragging inwards or outwards.
 Step 16 : Now look at the right of the top panel. You will find the tick mark. Click it.
 Here is the righted photo. That is all. You can try it out.


 This is an effect used in magazines. You need the Pen Tool and then to desaturate the image in Photoshop. The tutorial is here.
 This the age of color photography, but all of us have albums of old black and white photos. You can change a black and white photograph to color. It is not difficult.
 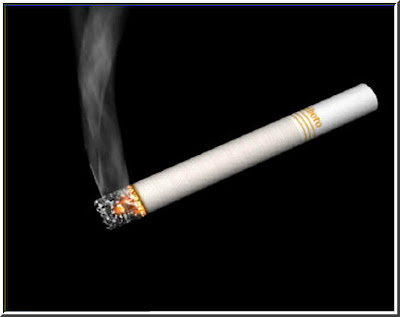 Step 1 : Open any image in Photoshop. I have opened this image.
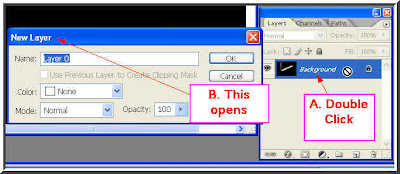 Step 2 : Double click the 'Background' in the Layers/Channels/Paths pallete (A), which will open the New Layer dialogue box (B) at left. Click ok on the New Layer dialogue box.
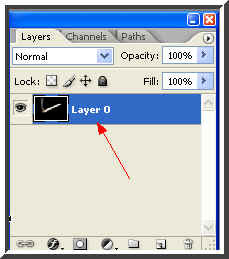 Step 3 : The Background layer changes to Layer o. It is now editable.
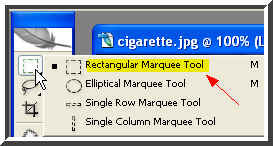 Step 4 : Click the Rectangular Marquee Tool
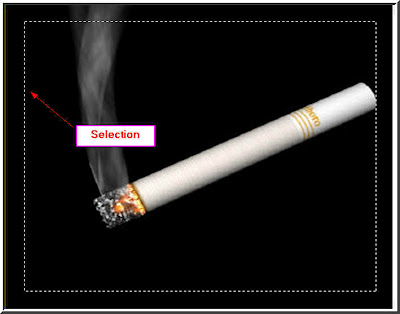 Step 5 : Draw a selection with the Rectangular Marquee Tool.
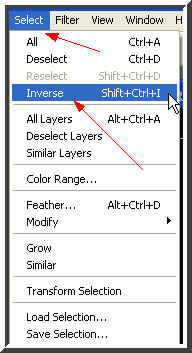 Step 6 : Go to Select>Inverse
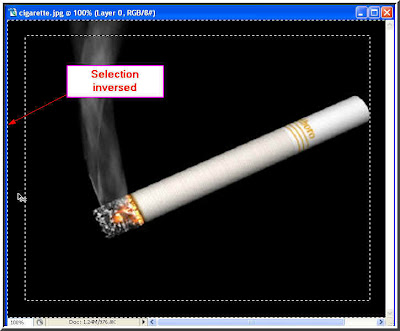 Step 7 : The selection has been inversed.
 Step 8 : Hit the delete key on the keyboard and the selected portion of the border is deleted.
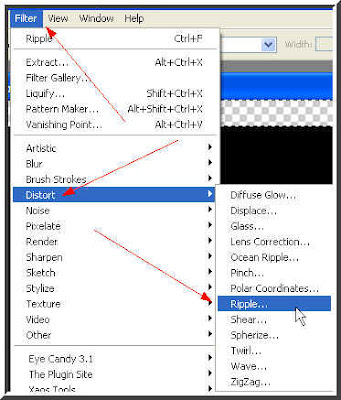 Step 9 : Go to Filter>Distort>Ripple
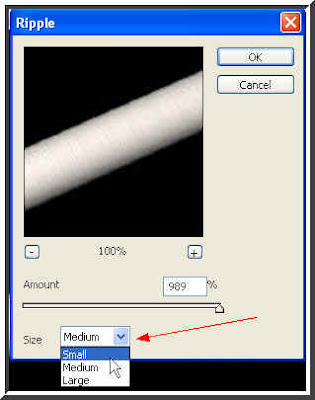 Step 10 : The Ripple dialogue box opens. Click where the red arrow points to and a drop down window will open. Select eighter small or medium from it. It will depend on your image. I have selected 'Small'. Click ok.
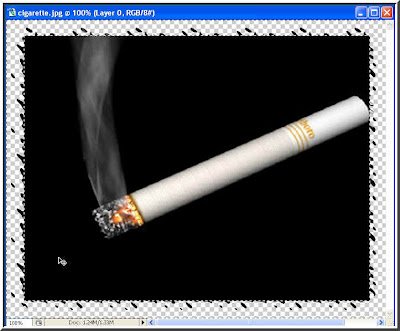 Step 11 : The border of the image now has a frayed look. Press CTRL+D to deselect the selection.
 Step 12 : Now click the Lasso Tool.
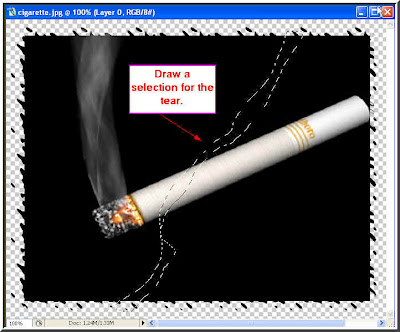 Step 12 : Draw a selection for the tear with the Lasso Tool. Then hit Delete. Then CTRL+D
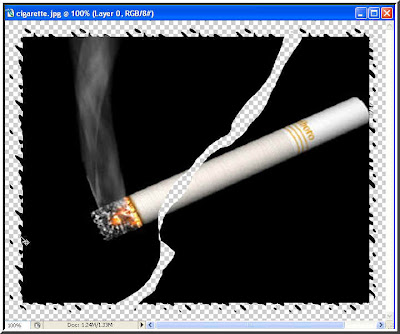 Step 13 : This is how the image looks.
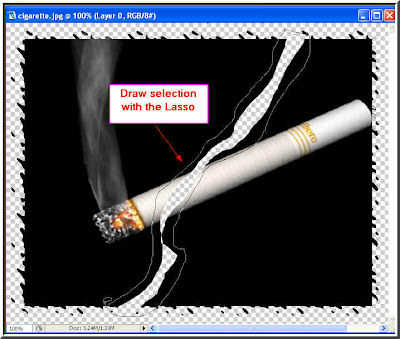 Step 14 : Draw a selection with the Lasso Tool outside the tear.
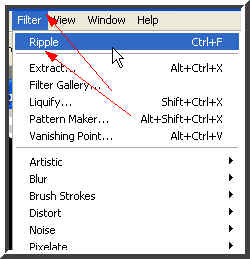 Step 15 : Go to Filter and you will find Ripple at the top now. Click it.
 Step 16 : This is how the image looks.
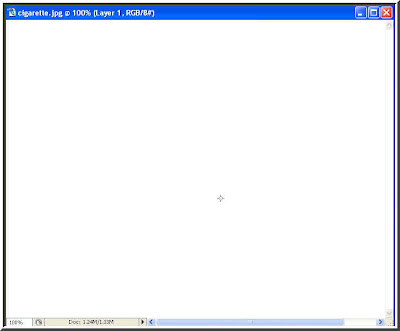 Step 17 : Open a new white layer and drag it over the image and completely cover it.
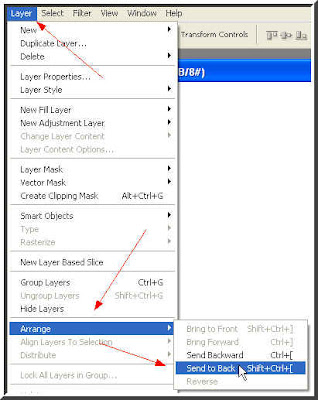 Step 18 : Go to Layer>Arrange>Send to Back.
 Step 19 : The white layer is now behind the image.
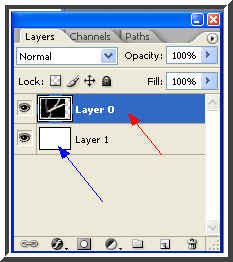 Step 20 : In the Layers/Channels/Paths pallette click on Layer o (blue arrow). Note that the new white layer is Layer 1 (red arrow).
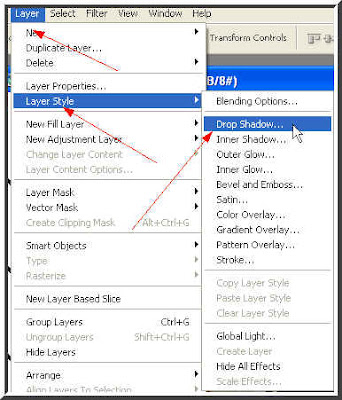 Step 21 : Go to Layer>Layer Style>Drop Shadow.
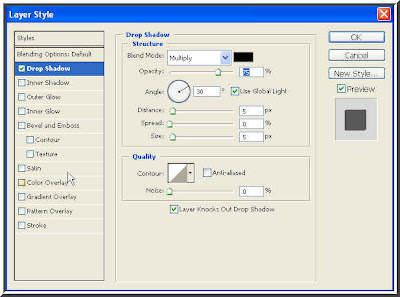 Step 22 : The Layer Style Drop Shadow Structure dialogue box opens.
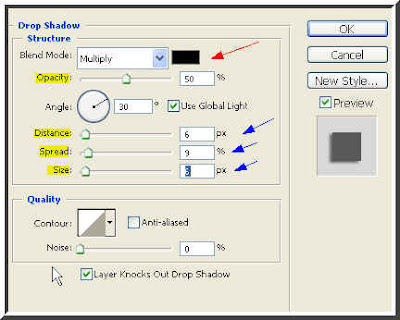 Step 23 : Drag the Distance, Spread and Sliders a little to the right and then reduce the Opacity slider (blue arrow) to 50 %. Click ok.
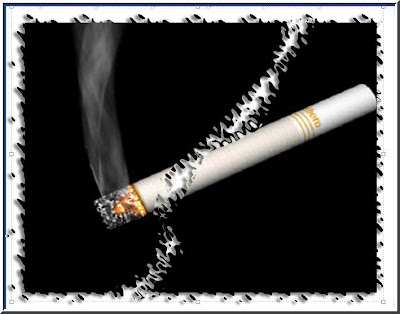 This is the torn photo.
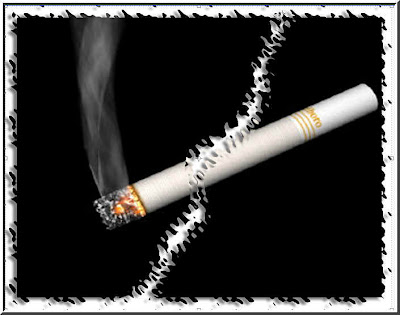 The same effect, but with Medium chosen in Step 11. That is all.