

 Sometimes you may need to touch up a photo maybe of a model or even your girl or boy friend.
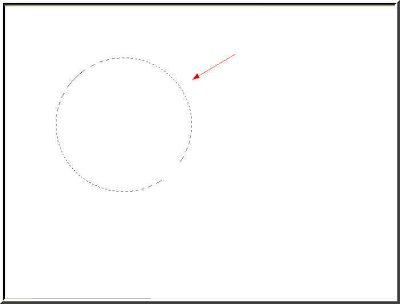
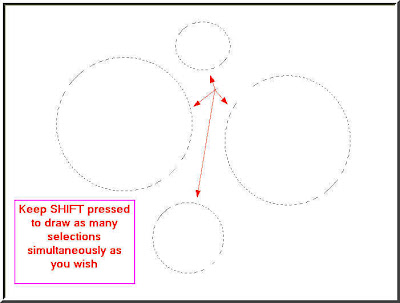
See the two diagrams. In the first I have drawn a circle. In the one below I have drawn four circles. To draw more than one selection just keep the SHIFT key on your keyboard pressed.It is the same when you make than one selection with the Magnetic Lasso Tool. With the Pen Tool you have to Add to Selection.

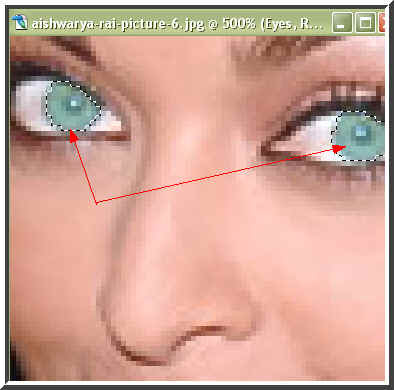
Here I have used the Magnetic Lasso Tool to select the right eye and keeping the SHIFT key pressed the left also. If you click wrongly, hit DELETE and it will remove that point. Continue as before.
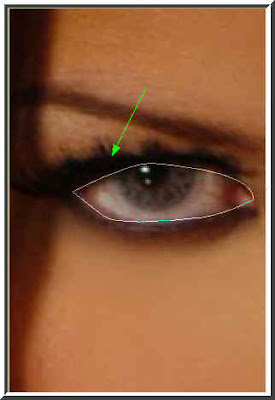
I have selected the left eye with the Pen Tool. When the selection closes it becomes a Path.
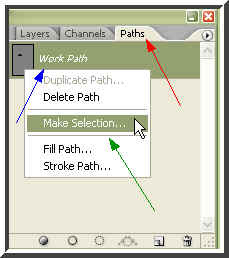
In the Layers/Channels/Paths pallete click on Path (red arrow) and you can see the 'work path' (blue arrow). Right click the workpath and the Make Selection dialogue box (green arrow) is visible. Click Make Selection.
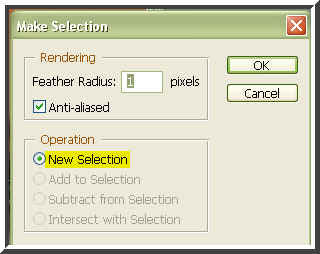
When you click the Make Selection. By default the New Selection will appear. Click ok.
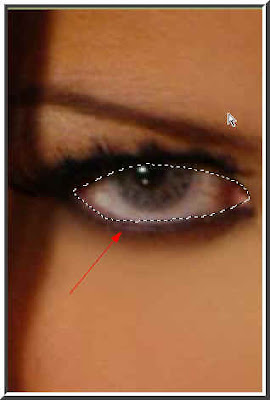
The eye has been enclosed by a column of marching ants i.e. it has been selected.
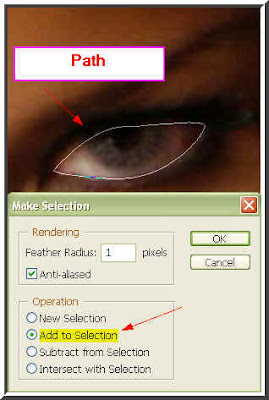
After I have selected the other eye with the Pen Tool and clicked on Make Selection ensure that 'Add to Selection' is checked.
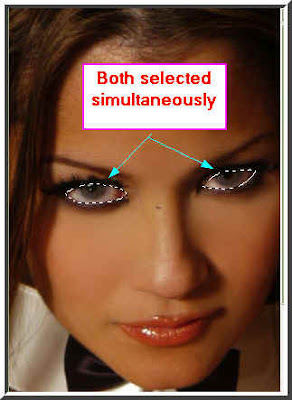
Both the eyes are now selected. Now that I have explained this let me proceed to the actual stuff. I explained these points because I will have to make selections again and again.
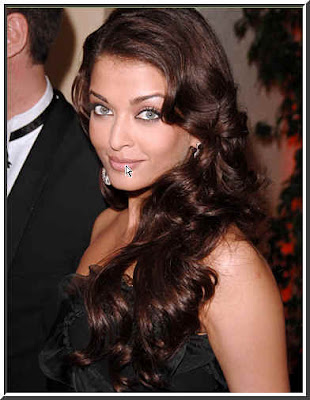
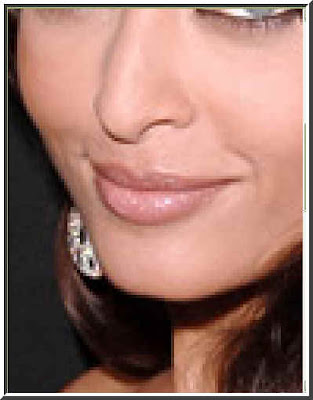
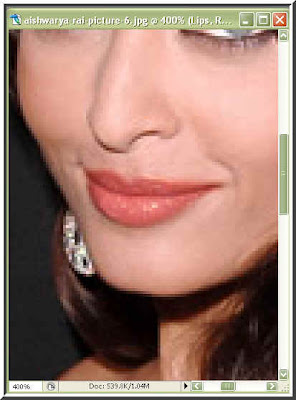
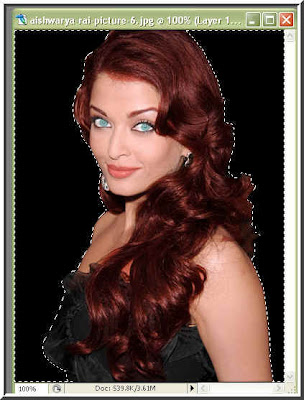
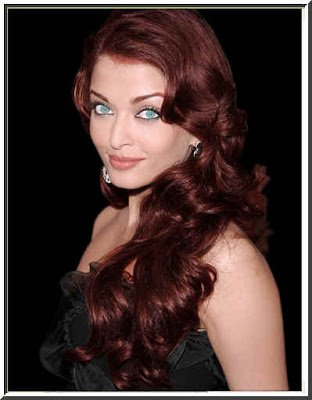
This photo of Aishwarya Rai is the one I have chosen for the tutorial. I will improve the color of her lips, eyes, skin and hair and also remove the distraction of the part of a man to her right. So here goes.
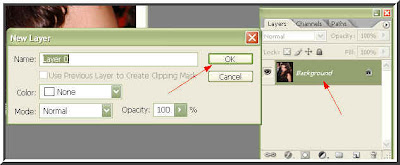
Step 1 : Double click the 'Background' and the 'New Layer' dialogue box opens. Click ok. The 'Background' changes to Layer o. This is to make it editable. A Background layer cannot be edited.
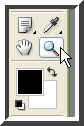
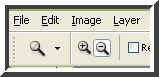
Now I will use the Zoom Tool. You can see where it is found on the left panel. Look at the top panel. You wil see the icons like magifying glasses. Click the plus sign to zoom in and the minus to zoom out. You can also use the bracket keys [ ] on your keyboard to zoom in or out instead of going to the top panel to click on the plus and minus magnifying glass icons.
Step 2 : I have zoomed in on her lips. I will select it. You can make the selection with the Pen Tool or Magnetic Lasso Tool.
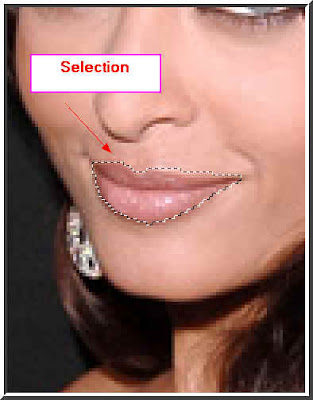
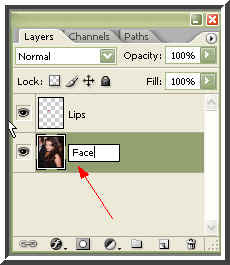
Step 3 : The lips have been selected. I will now press CTRL+J on the keyboard to copy and paste the lips to another layer.
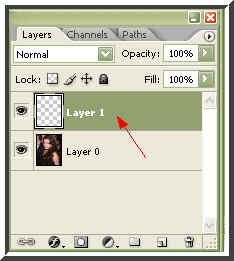

Step 4 : The lips have been pasted on a new layer in the Layer/Channels/Paths pallette. Double click where shown and rename it Lips.
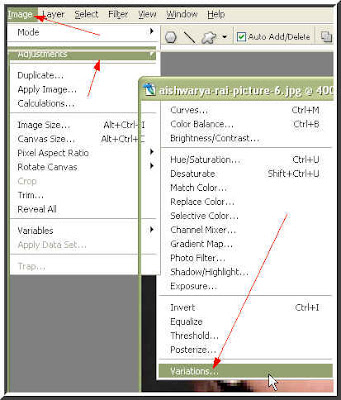
Step 5 : Now go to Image>Adjustments>Variations as shown.
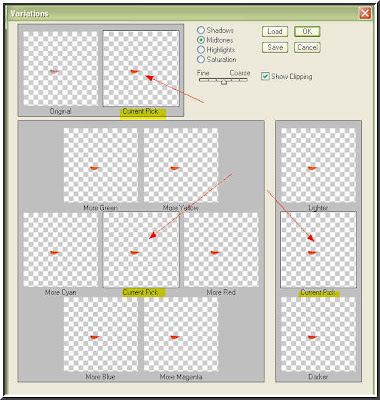
Step 6 : The Variations dialogue box opens. Note the 'current picks'. Also note More Magenta, More Yellow, More Blue etcs. The variations show the color currently selected. Now you can change the shade by clicking on More Red, More Yellow, More Green etc or whatever is suitable. On the right side you will see 'Lighter' and at the bottom 'Darker'. When you click on the colors once it adds the shade. If you click twice it will deepen the shade and thrice even more. You can also use the 'Lighter' and 'Darker' to fine tune the color. Note at the top left is the 'Original' color.
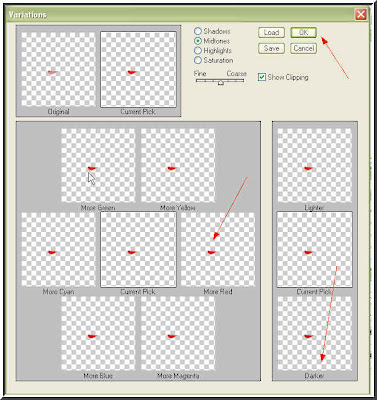
Step 7 : I have clicked on the 'More Red' a number of times and then on 'Darker'. Then clicked ok. Let us see what is the result.
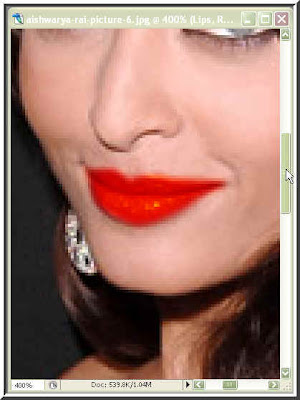
Step 8 : Now that's what I call red! But the red is too bright and unnatural. Let me fix that.
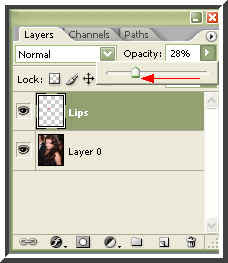
Step 9 : In the Layers/Channels/Paths pallette I have reduced the opacity. I have dragged the opacity slider to the left to decrease the opacity. The lips are still red, but not glaringly so. When you are using this tool you must experiment to see what looks right to you.
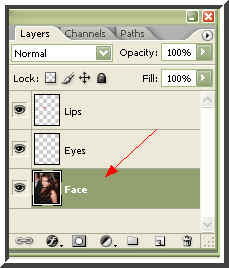
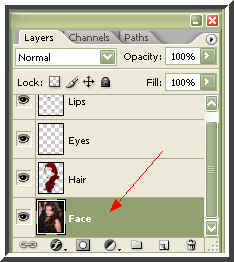
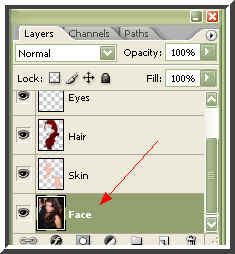
Step 10 : I am now clicking back on Layer 0 and renaming it face. This is just for convenience.
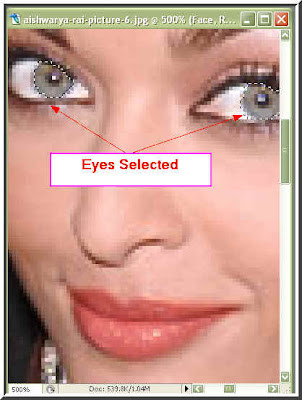
Step 11 : Now I have selected both the eyes simultaneously. I have explained above how this can be done.
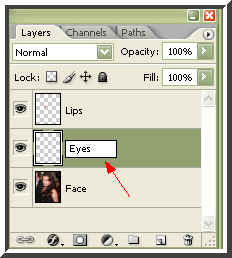
Step 12 : I have pressed CTRL+J on the keyboard to copy the eye selection on another layer. I have named the layer 'eyes'.

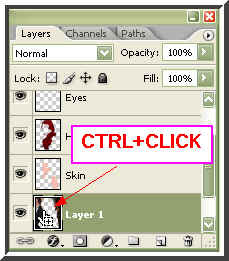
Step 13 : CTRL+click on the icon in the eyes layer to reselect the eyes.
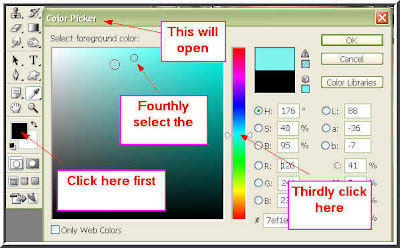
Step 14 : Click on the Foreground color. By default it is black. When you click it the Color Picker dialogue box opens. I have chosen light blue color from the column in the middle and then clicked the shade.
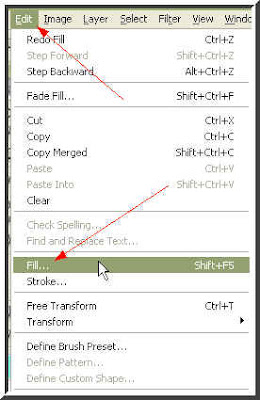
Step 15 : Now go to Edit>Fill.
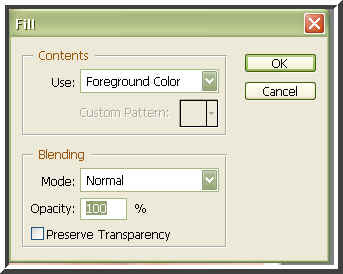
Step 16 : This dialogue opens. Click ok.
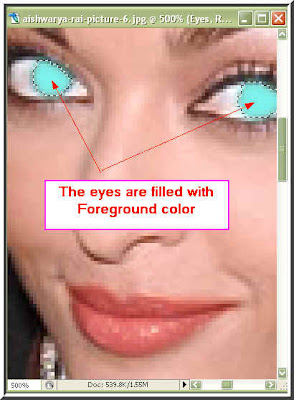
Step 17 : The eyes are filled with light blue color.
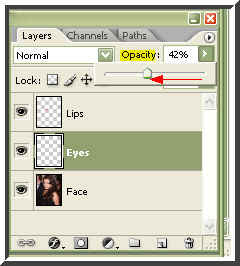
Step 18 : In the Layers/Channels/Paths pallete I have lowered the Opacity by dragging the slider to the left. This is done in the same way as for the lips.
Step 19 : The eyes are now a shade of light blue. Press CTRL+D to get rid of the selection. Now I will again go back to the Face layer.
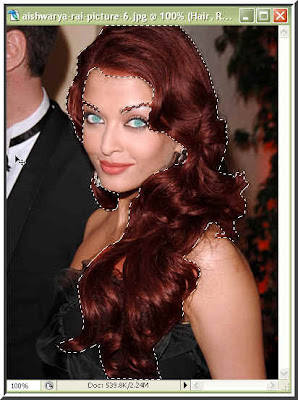
Step 20 : I have again clicked back on the Face layer. I will now select the hair.
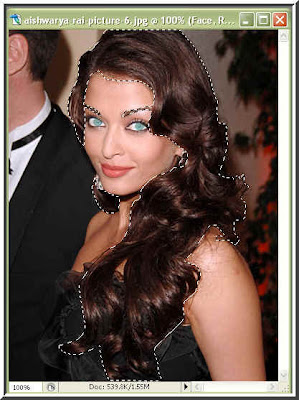
Step 21 : I have now selected the hair. Press CTRL+J on copy and paste the selection onto another layer.
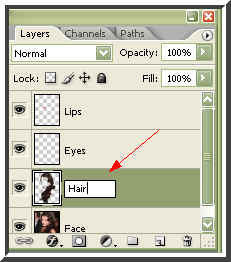
Step 22 : The hair selection has been copied and pasted on a new layer. I have renamed the layer 'Hair' for convenience.

Step 23 : CTRL+click on the hair thumbnail and the hair will be reselected.
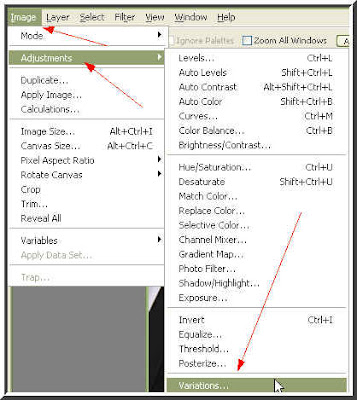
Step 24 : Go to Image>Adjustment>Variation.
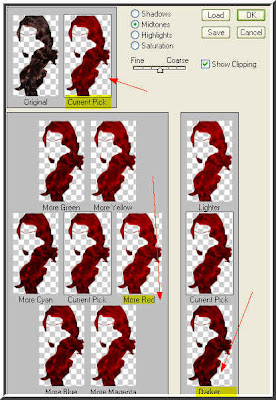
Step 25 : In the Variations dialogue box I have clicked on 'More Red' and then 'Darker' and then clicked ok.
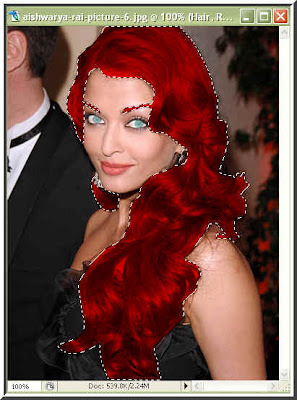
Step 26 : And Ash has become a red head!
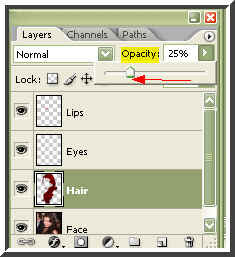
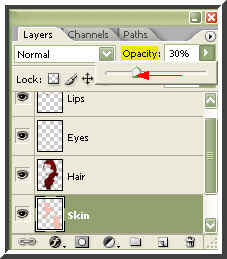
Step 27 : Go the Layers/Channels/Paths pallete and lower the opacity.
Step 28 : This looks more natural after lowering the opacity. Press CTRL+D to get rid of the selection. Now I will again go back to the Face layer.
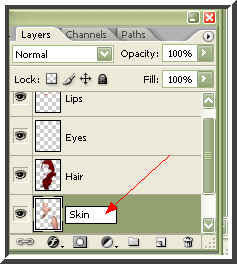
Step 29 : I have clicked back on the Face layer. Now I will select the skin.

Step 30 : The skin has been selected. Now I will press CTRL+J to copy and paste this into a new layer which I will label Skin.
Step 31 : The skin Layer.
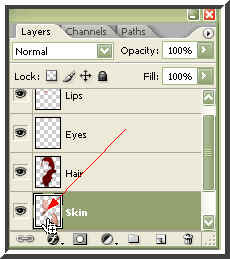
Step 32 : Now CTRL+click the Skin layer thumbnail to reselect the skin.
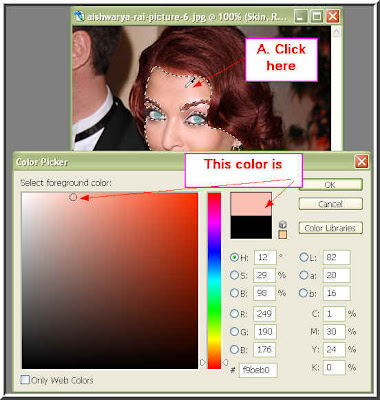
Step 33 : Click on the Foreground color (See step 14). After the Color Picker opens, I have then clicked on Ash's forehead which I will use as her skin tone. You can see that the color has been selected. Click ok.
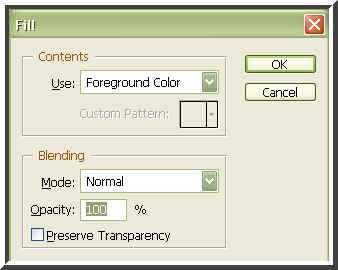
Step 34 : Press SHIFT+F5 on the keyboard (a shortcut) which will open the Fill dialogue box. Click ok. Now let's see what happens.
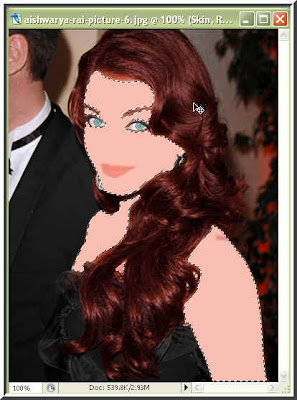
Step 35 : Ash has become absolutely pink!
Step 36 : Lower the opacity by dragging the opacity slider in the Layers/Channels/Paths pallette.
Step 37 : Now her complexion looks better and natural. Press CTRL+D to get rid of the selection.I will again go back to the Face layer.
Step 38 : I have clicked back on the Face Layer.

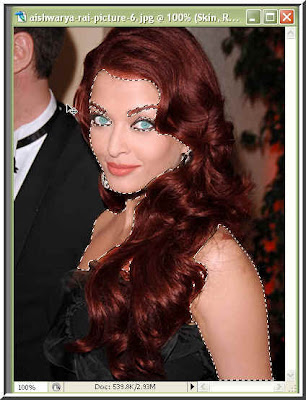
Step 39 : I have selected Ash's outline.
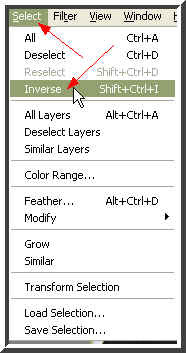
Step 40 : Go to Select>Inverse.

Step 41 : The selection has been inversed.
Step 42 : Now CTRL+click the layer thumbnail to reselect.

Step 43 : Make sure that the Foreground is set to black and Background to white. Click on the small black square below to set it to Black if it is some other color. Press SHIFT+F5 to fill the selection with black or go to Edit>Fill.
Step 44 : The selection has been filed with black. Press CTRL+D to get rid of the selection.
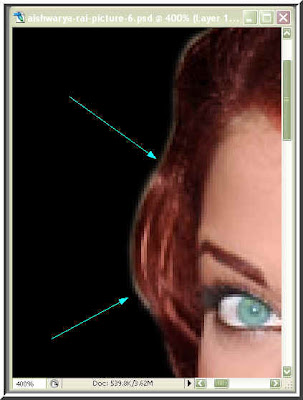
Step 45 : I have zoomed in on the image. A whitish blur shows near the edges of the image which will have to be removed.
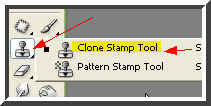
Step 46 : Click the Clone Stamp Tool.
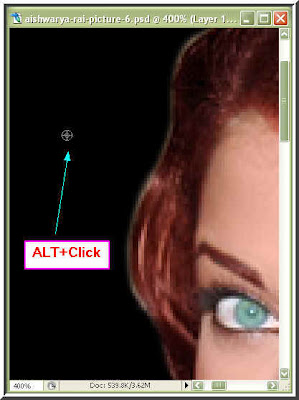
Step 47 : ALT+Click to select a point to clone from. You can increase or decrease the size of the Clone Stamp with the bracket keys [ ].
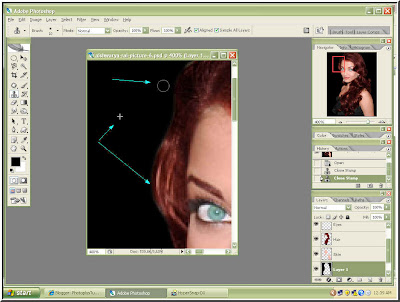
Step 48 : I have cloned away the faint whitish blur showing.
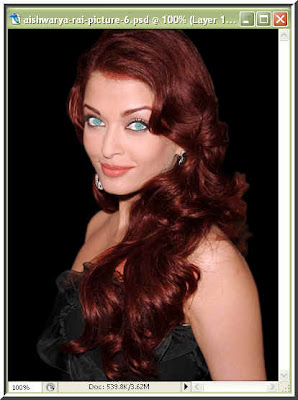
And there she is with a very glamourous look.
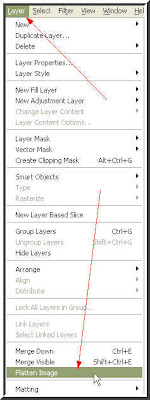
Step 49 : Go to Layer>Flatten Image.
Step 50 : Go to Layer>New Adjustment Layer>Channel Mixer.

Step 51 : This dialogue box opens click ok.
Step 52 : In the Channel Mixer dialogue box make sure to tick the Monochrome (highlighted in blue). Then drag the Red slider first. It will darken the image. Then drag the Green and Blue sliders. Lastly use the Constant slider. This will depend on your image. Click ok.

Step 53 : Drag the Background in the Layers/Channels/Paths pallette to the New Layer icon (the one like the folded napkin) and a Background copy will form.
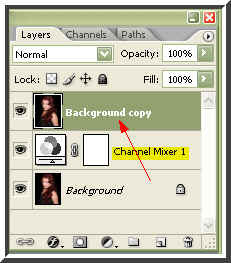
Step 54 : Drag the Background copy to above Channel Mixer layer.

Step 55 : Drag the opacity slider down by 20 %.
An there is you glamour portrait. That's all for now.
No comments:
Post a Comment