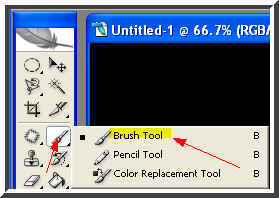
 The red arrow on the left points where the Brush Tool is to be found. When you click it a flyout opens and you can see where it is to be found.
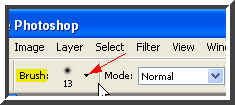 Now look at the top panel. You can again see the 'Brush'. The '13' is the size. Click where the red arrow points to and it will reveal a drop down box.
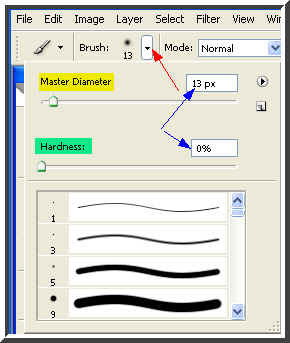 Here is the drop down box. The Master diameter sets the size of the brush tip. Note the slider just below it. It is to decrease and increase the size of the brush tip. The 'Hardness' determines how hard or soft the strokes will be. There is also a slider below it. When you drag it to the left or the right the hardness changes.
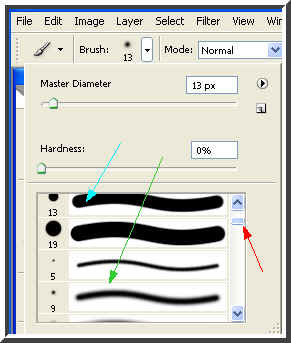 Note the three arrows. The red arrow points to a slider which you can lower and raise to see the brushes available in a set. The light blue arrow points to hard brush tip and the green to a soft brush tip which is thinner that the hard brush.
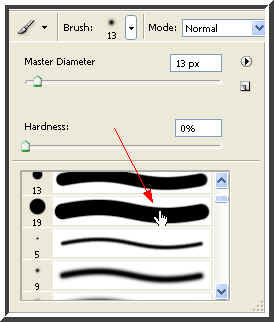 The red arrow and the white hand points to a no 19 brush (note the number on the left beside the brush). You must click to select a brush. Let me click it.
 Here is a hard brush stroke. Try it out.
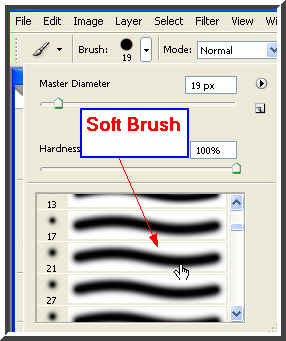 Now I am choosing a soft brush.
 Here is a soft brush stroke. Try it out.
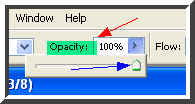 Now look at the Opacity of the brush. It is set a 100 %. Raising and lowering the opacity of the brush is needed sometimes. The blue arrow points to a slider which reduces and increases the opacity.
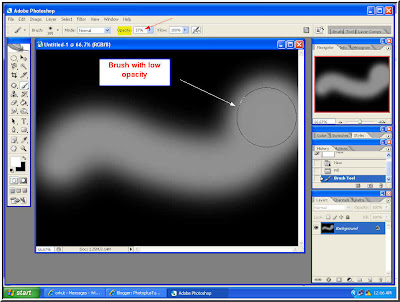 Here is a brush stroke with the opacity lowered.
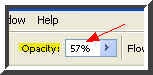 I have lowered the opacity of the brush to 57 % as you can see.
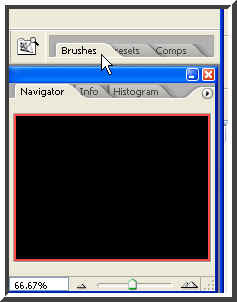 Now to access the brush sets. Click on the 'Brushes' at the top right of Photoshop.
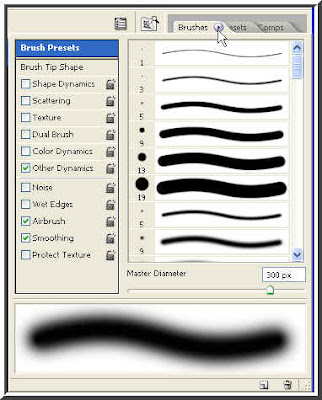 Notice a small black arrow beside 'Brushes' (the white arrow points to it). Click it.
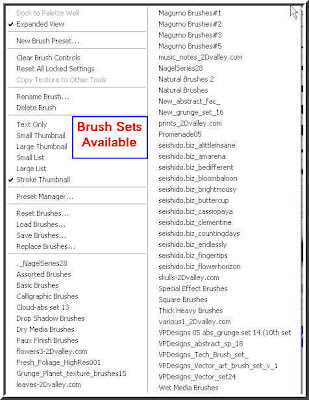 As soon as you click the brush sets become visible. I have downloaded a lot of free brushes from the internet and installed them here. Click to select the brush set that you want to use. You can download free brushes here.
 After you finish your work with the brush always remember to go here and click 'Reset Brushes'.
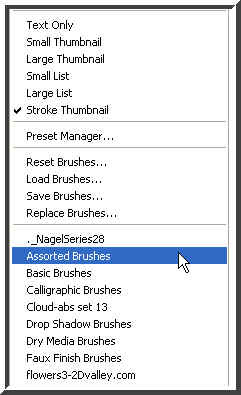 'Assorted Brushes' is built into Photoshop. Click it.
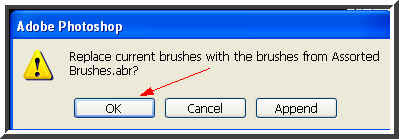 Whenever you choose a brush set this dialogue box opens. Click ok. Here I have chosen 'Assorted Brushes'.
 Now click on the Brush Tool again.
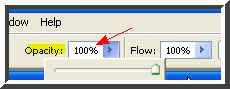 Make sure that the Opacity is set to 100 %.
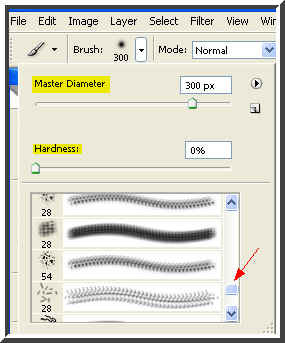 Here are the brushes available in this set. Let us click some of them to use them. Tip : to increase or decrease the the size of the brush use the [ ] bracket keys on the keyboard. This is a shortcut.
 I have chosen brush no 54.
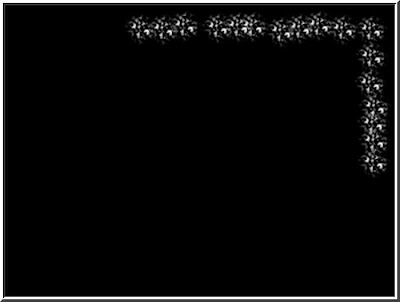 Here is the effect you get with brush no 54.
 Now I will use brush no 36.
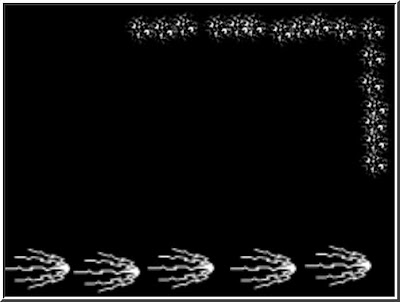 Here is the effect with brush no 36.
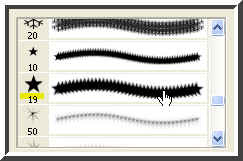 Now I will use brush no 19.
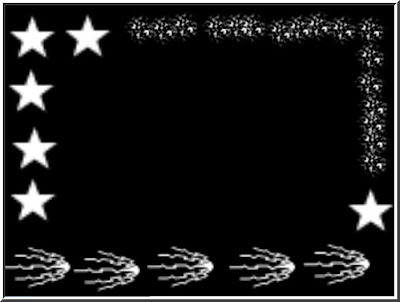 Here is the effect with brush no 19.
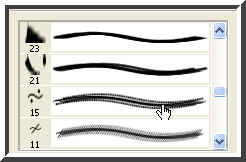 Now let me try brush no 15.
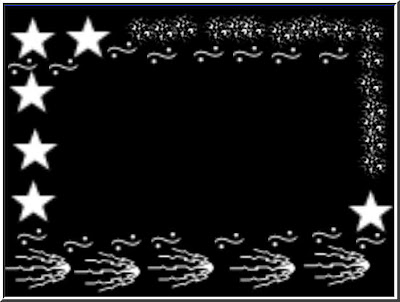 Here is the effect of brush no 15.
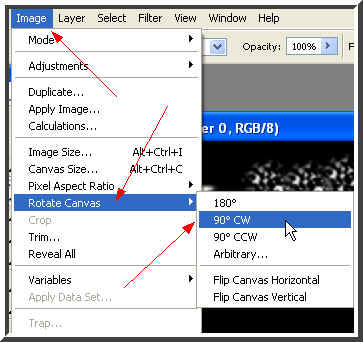 Now go to Image>Rotate Canvas>90 degree CW.
 Rotating the canvas allows me to carry on the brush work at the left and right sides.
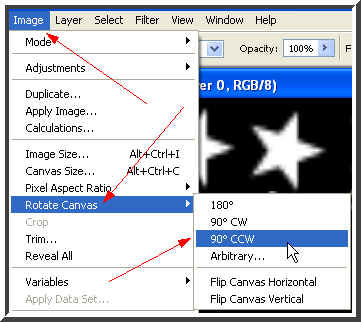 Go to Image>Rotate Canvas>90 degree CCW.
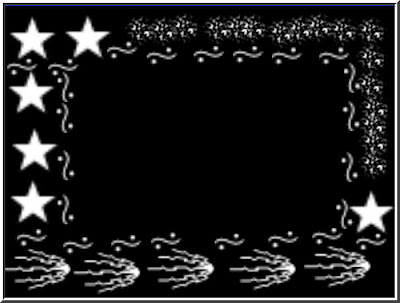 And you can see I have my canvas the right side up as before.
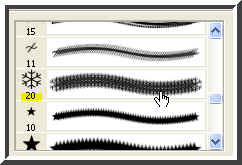 Now I will click on brush no 20.
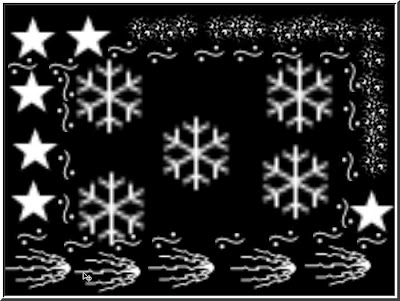 This is the effect with brush no 20.
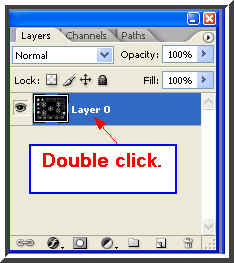 Step 1 : With the background ready let us see what we can do with it. Double click on 'Background' in the Layers/Channels/Paths pallete and it will change to Layer o. This will make it editable.
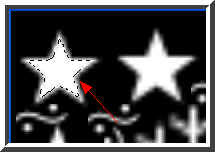 Step 2 : Use the Magic Wand Tool to click on one of the stars.
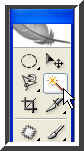 This is the Magic Wand Tool (white arrow)
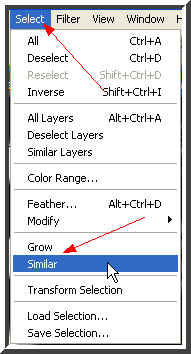 Step 3 : Go to Select>Similar.
 Step 4 : As soon as you click Similar you will all the white portions selected by 'marching ants'.
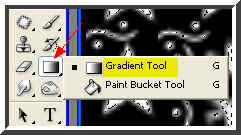 Step 5 : Now click the Gradient Tool.
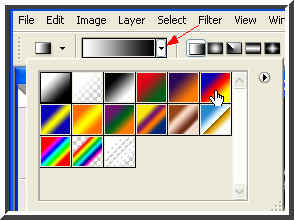 Step 6 : Click where the red arrow points to and this drop down window will open. I have chosen the gradient where the white hand points to. Click to select.
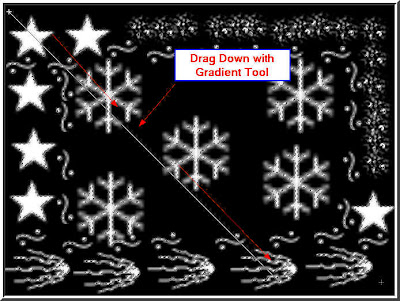 Step 7 : With the Gradient Tool selected drag from the left top corner to right bottom diagonally.
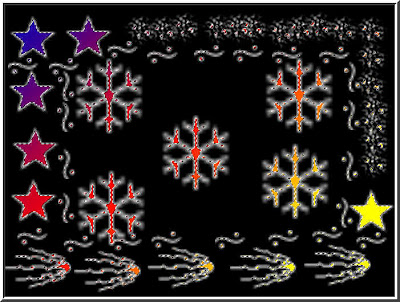 Step 8 : This is how the effect looks like. Now press CTRL+J.
 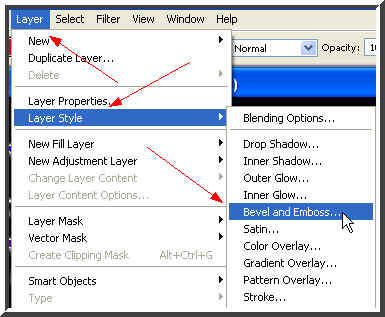 Step 9 : Go to Layer>Layer Style>Bevel and Emboss.
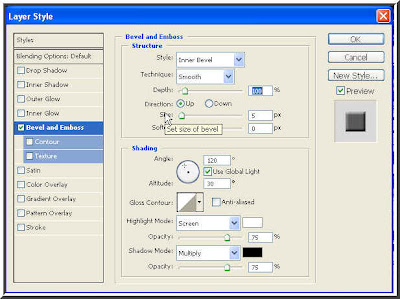 Step 10 : When the Bevel and Emboss dialogue box opens just click ok.
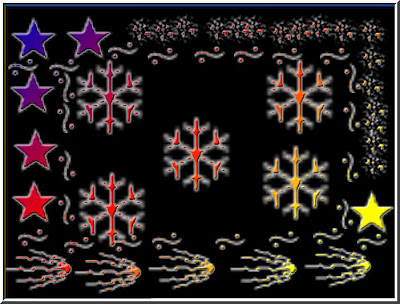 Step 11 : This is how the background now looks.
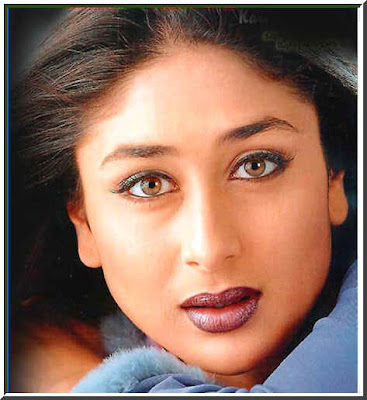 Step 12 : I will now drag this photo of Kareena Kapoor onto the background that I have created. But something has to be done before that.
 Step 13 : Click the Ellipical Marquee Tool.
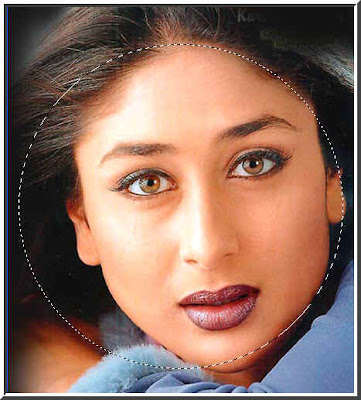 Step 14 : Press SHIFT on your keyboard and you will be able to draw a perfect circle with the Eliptical Marquee Tool.
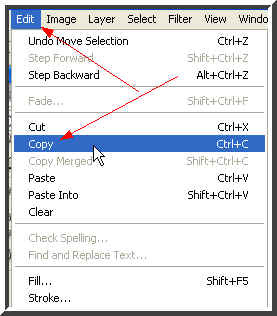 Step 15 : Go to Edit>Copy.
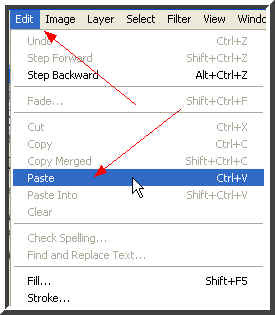 Step 16 : Click on the background that has been created. Go to Edit>Paste.
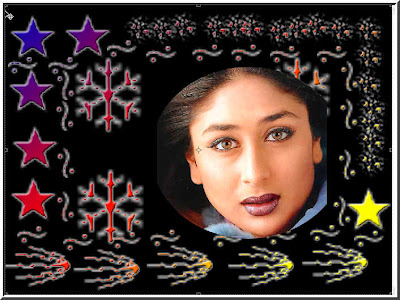 Step 17 : Karena's circular image has been pasted on the background.
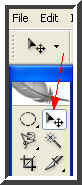 Step 18 : Now click the Move Tool. Press ALT on your keyboard and resize Kareena's image suitably. Also reposition it.
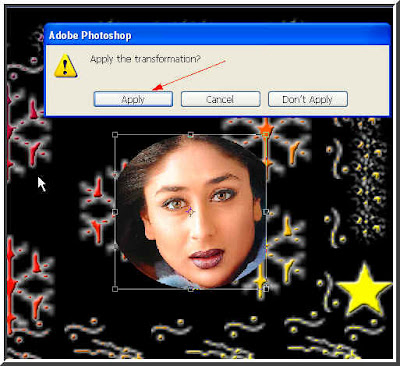 Step 19 : Grab one of the corner handles to resize. Ater resizing click the Move Tool or any other tool and the above dialogue box opens. Click Apply.
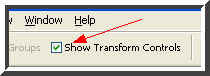 Should you not be able to see the corner handles, then the 'Show Transform Controls' on the top panel is not checked. Check it. In Photoshop 7 it is called 'Bounding Box' and found in the same place.
 Step 20 : Go to Layer>Layer Style>Stroke
 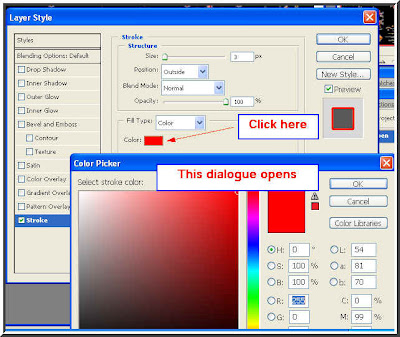 Step 21 : When the Stroke dialogue box opens click the red color box. This will open the Color Picker.
Step 22 : Now in the Color Picker click where the light blue arrow points to to choose the white shade.

Step 23 : After you select the Stroke color notice the red box where the arrow points to. The top half changes to the color I have selected. Click ok.

Step 24 : In the Stroke dialogue box drag the Size slider to determine how much the stroke should be. The stroke is like a border. As you drag the slider you will be able to see the effect. Click ok when satisfied.

Step 25 : The Stroke has been applied.

Step 26 : I have opened another image of Kareena which I will move to the background.

Step 27 : I have moved the new image of Kareena onto the background and resized it.

Step 28 : Click the Move Tool or any other tool to apply the transformation. Click Apply.

Step 29 : Now apply a Stroke to this image also as in Step 20 to Step 25.

Step 30 : Now go to Edit>Transform>Rotate

Step 31 : When you hover you cursor near the corner a double sided bent arrow appears. Click on it to rotate in the direction you want. Then click the Move Tool and Apply the Transformation as in Step 27.
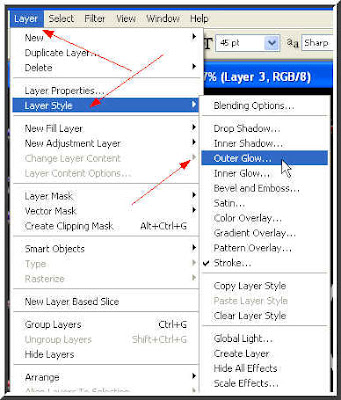
Step 32 : Go to Layer>Layer Style>Outer Glow.

Step 33 : The Outer Glow dialogue box opens. Click 'A' . The default color is yellow. When you click the Color Picker dialogue box opens. Click the white (see B). You will find the color selected has changed to white (see C). Click ok.

Step 34 : In the Outer Glow dialgoe box First drag the Size slider (A) to the left then the Spread slider (B) till you are satisfied.
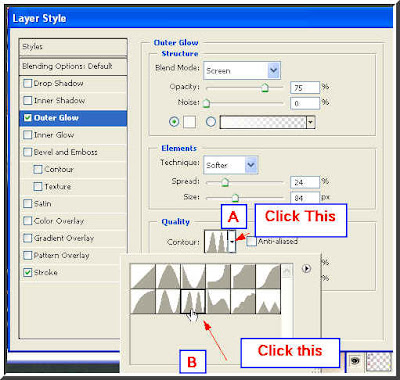
Step 35 : Now click A. This will show a drop down box. Click B. Click ok.
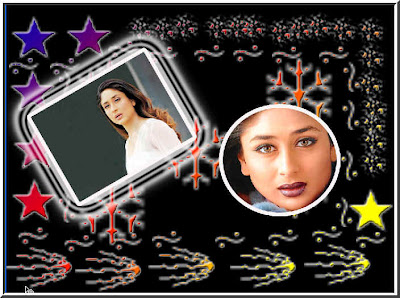
Step 36 : This is how the image now looks like.

Step 37 : Now look at the Layers/Channels/Paths pallete. I have been working on Layer 3 (red arrow). I will now switch to Layer 2 (blue arrow) by clicking it. It is the Layer which contains the Kareena's round image.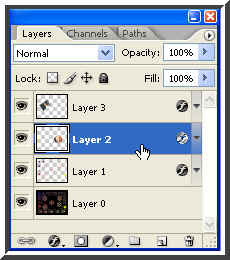
Step 38 : I have now clicked on Layer 2. Now add a stroke following Steps 30 to 33.

Step 39 : The Stroke has been added.

Step 40 : Now click the Type Tool. Make sure that the Foreground color is set to White as the background that I have used is black. To change between Background and Foreground colors click the small bent arrow shown by the green arrow.

Step 41 : Draw out a selection as shown where you want to add text.

Step 42 : When you click the Text Tool look at the top panel. Click where the white arrow points. It will reveal a dropdown box of the fonts available (red arrow). To set the size of the font enter it into the box where the blue arrow points. If you enter a size that is too large for your selection you will be unable to see the cursor. Set a smaller size and the cursor which blinks will reappear.
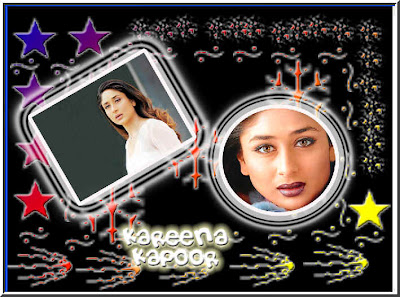
Step 43 : I have added the text.

Step 44 : Go to Layer>Layer Style>Bevel and Emboss.

Step 45 : Just click ok.

Step 46 : Add an Outer Glow following Step 32 to 35. But retain the default yellow color and change the Technique to 'Precise' from the dropdown box. Click ok.
And there you are. Please take your time. You will be able to do it too. You can dowload brushes fromthe link I have provided above for creating more effects with brushes. That's all for now.