 Have a look at this image. Since it is small it may not be apparent that it is a low resolution image. When you enlarge a low resolution image noise creeps in. But this can be tackled. First let me show you what this image is like.
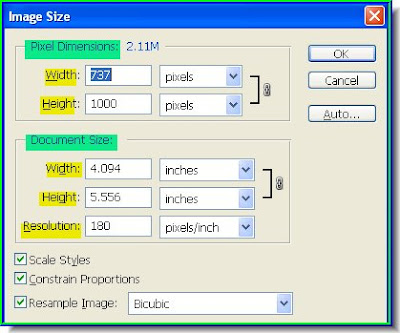 Step 1 : Press ALT+CTRL+I and the Image Size dialogue Box will open. It is divided into two portions -- Pixel Dimension and Document Size. The reolution of this image is tolerable at 180 pixel. A good photo should have a resolution of 300 pixels and at the least 200 pixels. Ensure that Scale Styles, Constrain Proportions and Resample Image are checked. Do not click ok as yet.
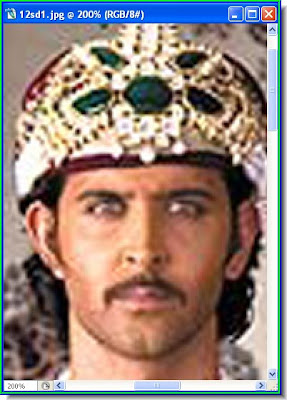 Step 2 : I have zoomed in on the image to show its imperfections.
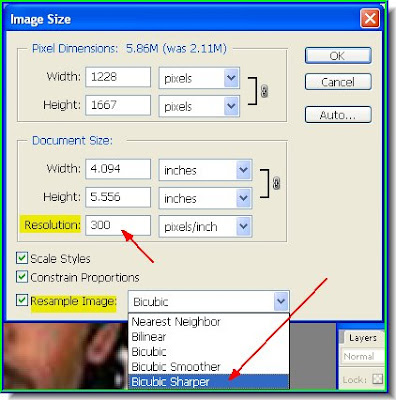
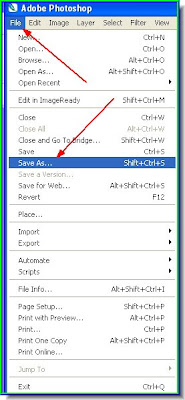
Step 4 : Go to File>Save as and save your image on your computer.
Step 5 : This dialogue box comes up. Choose Maximum as Quality. Also note the size of the image highlightes at the bottom. The slider is used to increase or lower the size of the image. Click ok.
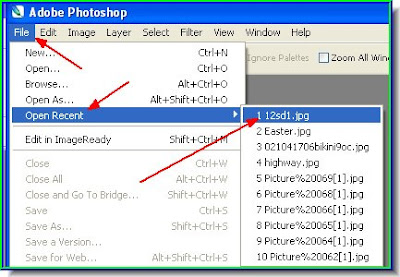
Step 6 : Now go to File>Open Recent. You will find the photo on top. This will open the image in Photoshop again. Step 7 : I have opened the photo again in Photoshop.
 Step 8 : Press ALT+CTRL+I to open the Image Size dialogue box again. You will find that the changes you made in it in Step 3 there. Click ok.
 Step 9 : Zooming in on the image reveals that there are ugly blotches. These have to be corrected.
 Step 10 : Now duplicate the background. Use the Move Tool to drag the Background to the New Layer icon shown by the red arrow and a Background copy layer is formed (blue arrow).
 The red arrow shows the location of the Move Tool in case you did not know.
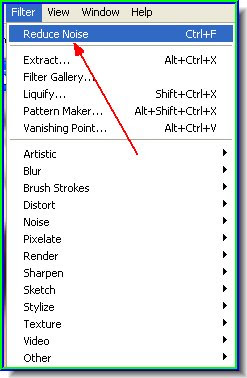
Step 11 : Go to Filter>Noise>Reduce Noise.
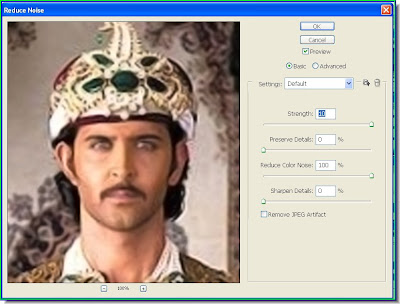
Step 12 : The Reduce Noise dialogue box opens.
Step 13 : On the right hand side of the Reduce Noise dialogue box drag the sliders to the left and right fully as shown. Click ok.
Step 14 : Go to Filter again. You will find reduce noise at the top. Click to apply it again.
Step 15 : The skin has become smooth, but details such as eyes and lips have become blurred. That has to be fixed.
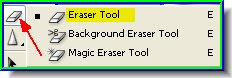
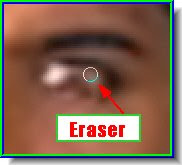
Step 16 : Click on the Eraser Tool to select it.
Step 17 : With the Eraser Tool gently wipe away near the eyes and eyebrows. You can increase or decrease the size of the tip by using the bracket keys [ ] on your keyboard.
Step 18 : Now use the Erazer to wipe the right eye and eyebrows. Step 19 : Now do the same with the moustache and lips.
Step 20 : I have also erased a part of the crown. You should use the eraser to make portions like this prominent.
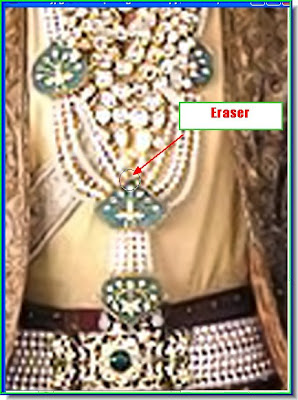
Step 21 : I have used the Eraser on the ornaments too.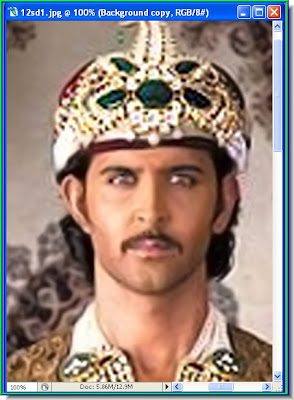

A close up of the face with the blotches removed and the finished image. Just be a bit painstaking and pay attention to small details and you will come up with excellent results.
No comments:
Post a Comment