 This is the free, high resolution stock photo I have downloaded from the link I have given above.

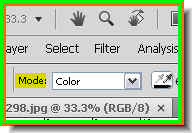
Step 2 : Look in the top panel after clicking on the Color Replacement Tool. The Mode is set to Color. The Limits are set to Contiguous.

Here is a closer look at the Mode. It is set to Color.

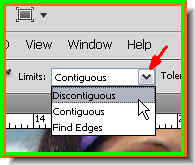
The Limits are set to Contiguous and Tolerance to 30%.

Step 3 : From the Limits change Contiguous to Discontiguous. There is another option also 'Find Edges'. The Discontiguous option ensures that the color is not changed in discontiguous areas as you paint, while the 'Find Edges' finds the edges of the color that is being replaced.

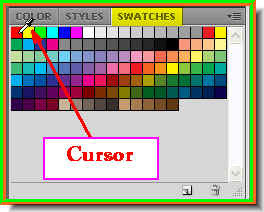
Step 4 : Now click on a color from Swatches found on the right panel in Photoshop. If you cannot find the Swatches click on Windows at the top and from the dropdown menu click on Swatches to access it. I have clicked on Red from the Swatches.This is an easy way to select a color.
 Step 5 : Note that the Foreground Color changes to the color I have picked.
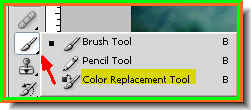
 Step 6 : Now click on the Color Replacement Tool from the flyout.
 Step 7 : I have begun painting with the Color Replacement Tool. My background is the same color as the shirt. So I have to be careful. Even checking the Discontguous in Limits will not be a help. If you go wrong press CTRL+Z. This will undo the last step. Or go to Edit>Step backward.
 Step 8 : I am painting the shirt. Change the brush tip from small to big with the [ ] (bracket keys) on the keyboard. The ] (right bracket) is to make the tip bigger and the [ (left bracket) will make it smaller. Vary the brush tip as you paint. Paint in short strokes only.
 Step 9 : I have changed the color of the shirt to Red.
 Step 10 : Now I am changing the Limits to Find Edges.
 Step 11 : I have now changed the color of the head band and scarf to red. That is all there is to it with the Color Replacement Tool. Try it out CS users.
No comments:
Post a Comment