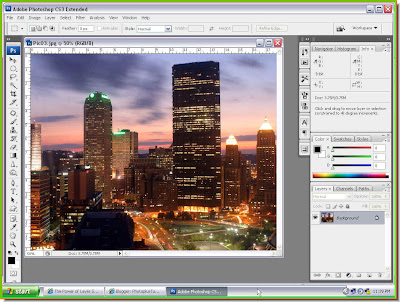
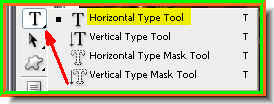
Step 2 : Select the Type Tool and from the flyout, choose Horizontal Type Tool. Step 3 : In the top panel click where the white arrow points to, to reveal a drop down of the fonts available.

Step 4 : Also in the top panel you can set the size of the Font (red arrow), the margin (blue arrow) and color of the text (orange arrow).

Step 5 : Now click to reveal the dropdown containing the fonts. I have chosen Impact.
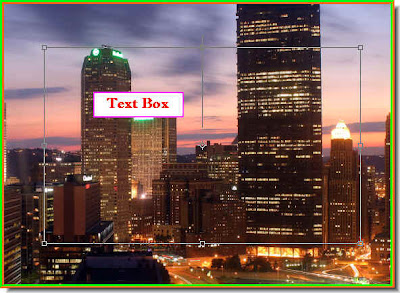
Step 6 : Draw out the Text Box with the Text Tool.
Step 7 : I have typed in the text.
Step 8 : Use the Move Tool to resize the text. If you are not aware of working with Text see the tutorial here.

Step 9 : I have resized the text.

Step 10 : Make sure that the Foreground Color is Black and Background is White. If it is not, press x then d on the keyboard to set it to the default Foreground and Background colors. Step 11 : Press CTRL+BACKSPACE. This will the text with the Background Color or White.
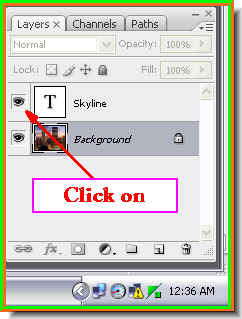
 Step 12 : Click off the eye icon on the Text Layer. The text disappears. Click on the Background Layer. Then drag Background to the New Layer buton and you will get a duplicate Background layer. The Duplicate layer is named Background copy by Photoshop.
 Step 13 : Go to Filter>Distort>Glass.
Step 14 : The Glass dialogue box opens.

Step 15 : You will find the controls on the top right of the Glass dialogue box. I have dragged the Distortion slider all the way to 20 and given Smootness a value of 13 and Scaling at 184. Leave the Texture set at Frosted. Click ok.
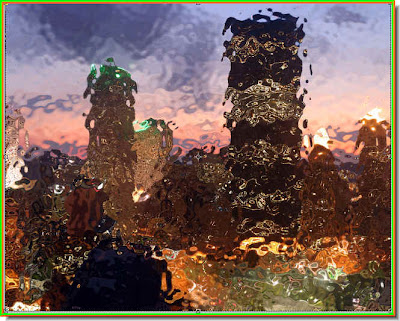
My photo now looks like this. Step 16 : Go to Edit>Define Pattern.

Step 17 : The Pattern Name dialogue box pops up. I have entered glass as the name. You can name your pattern anything you wish. Click ok.

Step 18 : I now no longer need the Background copy layer. Drag it to the Trash can to delete it.

Now only the Text and Background layer remains.
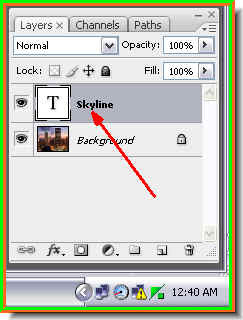
Step 19 : Now click back the eye icon on the Text layer.
The text becomes visible again.
Step 20 : Click on the Text Layer. Step 21 : Click the Add Layer Style button. In PS 7 it looks a bit different, but it is in the same place.
Step 22 : From the popup click on Blending Options.

Step 23 : The Layer Styles dialogue box opens.

Step 24 : In the panel at the left of Layer Styles click on Drop Shadow where the white arrow points to. It will reveal the Drop Shadow controls at right.

Step 25 : The Drop Shadow controls become visible. I wil leave them unchanged.

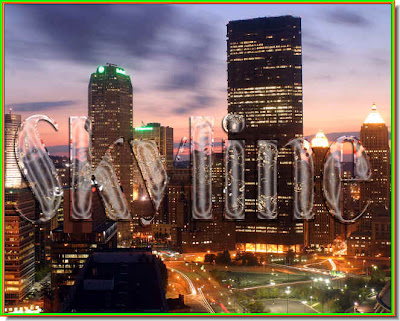
This is how the image looks after applying Bevel and Emboss. DO NOT CLICK OK.
Step 26 : Now click on Pattern Overlay.

Step 27 : The Pattern Overlay controls are revealed.

Step 28 : Click where the white arrow points to. It will reveal a drop down box. The last pattern will be the one that was saved by me in Step 17. Click to select it.

Step 29 : First uncheck the Link with Layer, then click Snap to Origin. DO NOT CLICK OK.

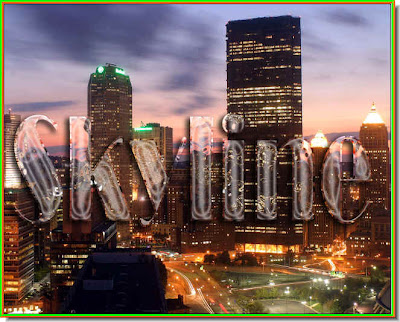
Step 30 : This is how the image looks.
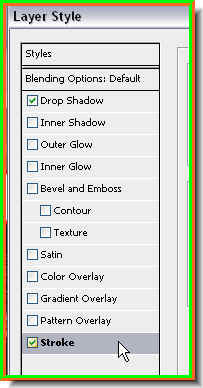
Step 31 : Now click on Stroke.
Step 32 : Change the Fill Type to Pattern.

Step 33 : Click Pattern and from the dropdown choose the Pattern I have chosen. It is the last one on the right in the top row.
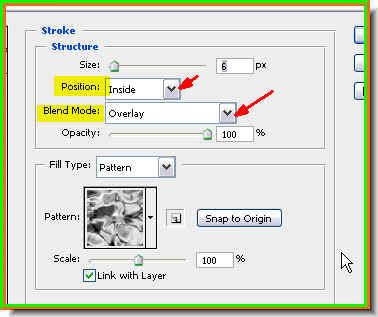
Step 34 : Now change the Position to Inside and Blend Mode to Overlay from the dropdowns. Also change the Size to 6 pixel. DO NOT CLICK OK. Step 35 : Now click on Satin.
Step 36 : In the Satin Controls, click on the Black color box.

Step 37 : In the Satin Color box click on the White as shown by the arrow. Click ok in the Satin Color box.

Step 38 : Now click on the Contour and from the dropdown click on the Contour shown. It is called Ring Double.

Step 39 : I have also increased the Size to 54 pixel. DO NOT CLICK OK.
This is how the image looks. Step 40 : Now click on Drop Shadow.
 Step 41 : In the Drop Shadow controls I have dragged the Szze slider to 18 and Distance slider to 14.
Step 42 : Now click ok in the Layer Style dialogue box.
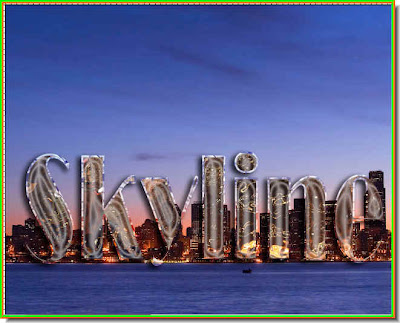
Step 43 : The completed text.
You can move the Text anywhere on the image, the text styles will not be disturbed.

I have repositioned the text again.
You can even drag the Text to a completely different image without disturbing the Layer Style. That is all.
No comments:
Post a Comment