
Step 1 : Open a photo in photoshop. I have opened a photo of this girl.


Step 2 : Use the Magnetic Lasso or the Pen Tool to cut out out the figure from the background. If you do not know how to use these tools click the highlighted links to learn how to use them. I take it for granted that you know how to use them.

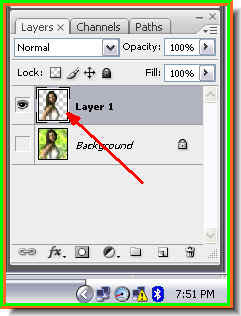
Step 3 : The top image after cutting out the girl from the background. The bottom image shows how the Layers pallette looks. The cutout image is on Layer 1 after being cutout from the background. Turn off the eye icon of the Background layer. Step 4 : Press CTRL+SHIFT+U. This will desaturate the image.
Step 5 : Press CTRL+L. This will bring up the Levels dialogue box.
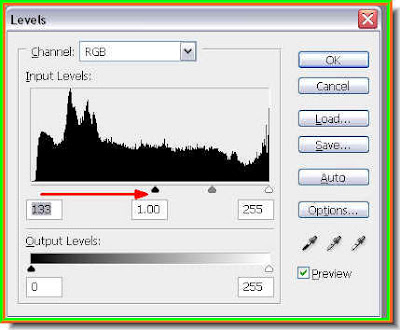
Step 6 : Drag the Black slider at the left toward the middle gradually. This will darken the image.
Step 7 : This is how my image looks.
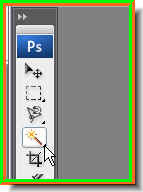
Step 8 : Click the Magic Wand tool to select it.
Step 9 : Click on a black portion on the image. A selection forms immediately.

Step 10 : With the selection in place press CTRL+J. This will cut and paste the selection into a new layer -- Layer 2. Switch of the eye icon of Layer 1.

Step 11 : This is how the image looks.

Step 12 : Drag a new white layer into the background. That is all. Easy was it not?
No comments:
Post a Comment