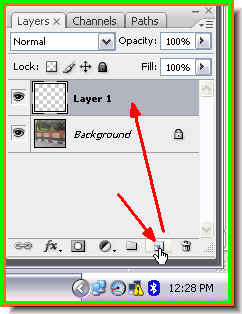
Step 1 : Click the New Layer icon. This forms a new layer -- Layer 1.
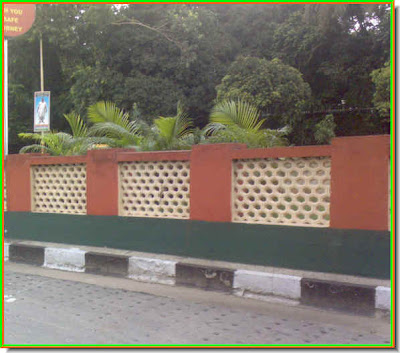
Step 2 : Make sure that your Foreground is set to Black and Background to White. If not press X and then D on your keyboard to set it to the default.
 Step 3 : Press ALT+Backspace. This will fill Layer 1 with the Foreground color i.e. Black.
Step 4 : I am reducing the Opacity of the Layer 1 to 25 %.

Step 5 : I am now changing the Blend Mode to Soft Light from Normal from the menu.
This is how my image looks now. Slightly better. There a little bit more contrast.
Step 6 : Click the New Layer icon and a new layer -- Layer 2 forms.

Step 7 : Change the Blend Mode to Soft Light and reduce the Opacity to 25 %.
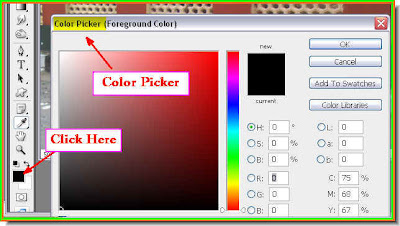
Step 8 : Click the Foreground Color. This will bring up the Color Picker.
Step 9 : Look at the column of color in the middle of the Color Picker. It is called the Spectrum. You will find a slider. Drag it up or down to select a particular color. I have dragged it up to Green. Click ok and exit the Color Picker.
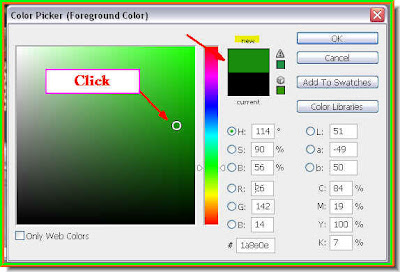
Step 10 : I have clicked on a dark shade of green. Note that the 'new' in the top half of the box changes to the color picked.
The Foreground Color changes to the color I picked.

Step 11 : Click on the Brush Tool to select it.
Look at the top panel. It shows you the size and whether the brush tip is hard or soft. The size given is 90. It is a soft brush. How can you make out whether the rbush is hard or soft? Look at the step below. It is explained there.

To make a Brush hard tipped, press SHIFT and the ] (right bracket) a number of times till you are satisfied with the tip shape. A hard tipped brush is shown in the illustration above.

To make the brush tip soft press SHIFT and [ (left bracket) a number of times till you are satisfied with the tip shape.
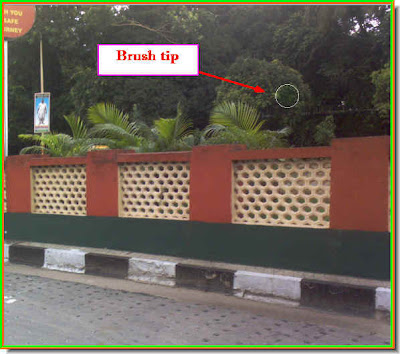
This is how the Brush Tip looks after you click the Brush Tool. To make the Brush Tip bigger or smaller use the [ ] (bracket) keys. Use the [ (left bracket) to make it smaller and ] (right bracket) to increase the brush tip size. These are useful shortcuts.
 Step 12 : Now since I have chosen green as the Foreground Color I am painting the foliage green.
Step 13 : The foliage looks greener after painting with green.
Look in the Layers pallette. You will find the 'green paint' on Layer 2.

Step 14 : Click the New Layer button. This will form a new layer -- Layer 3.
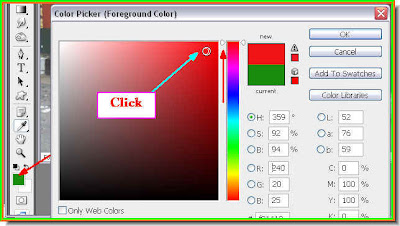
Step 15 : Again click the Foreground Color. It is now Green since I was working with the Green. Clicking the Foreground Color brings up the Color Picker again. Drag the slider beside the Spectrum to the top to the red. Then I have clicked on a bright shade of Red. Notice that the top half of the box at the top or 'new' changes to Red. Click ok and exit the Color Picker. Step 16 : I am using the Red to paint on the Red portions of the image.
 Step 17 : I have made the Brush Tip smaller with the [ (left bracket) key.
I have finished working with the Red.

You can see the Red color I have used in the Layer 3 in the Layers pallette.

Step 18 : Go to Layer>Flatten Image.

All the Layers have been flattened into a single layer i.e. the Background.
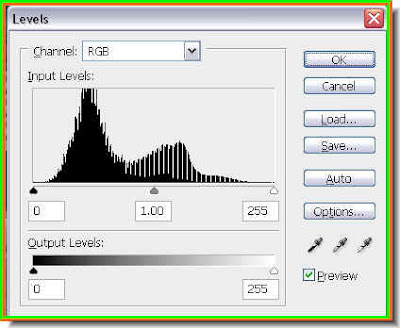
Step 19 : Press CTRL+L. This will bring up the Levels dialogue box. The Black slider at left is to darken, the White slider at right is to brighten and the Grey slider in the middle is to increase the highlights.

Step 20 : For this image I have dragged the Left Slider to the right and the White slider to the left. How you use the Levels will depend on your image. These are general guidelines. Click ok in the Levels dialogue box.

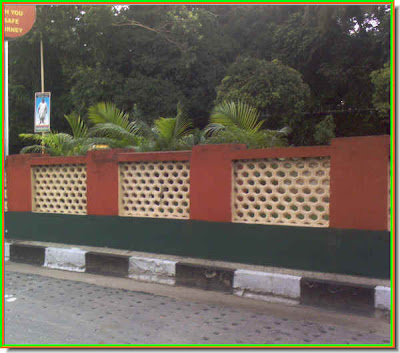
This is the finished image.
No comments:
Post a Comment