 Step 2 : Click the Text Tool and select the Horizontal Type Tool.
Step 3 : Click the dropdown to reveal the list of fonts available. You will need a variety of fonts for a cover.

Step 4 : Look at the top panel to set the size of the Font, the Margin and the color of the Text. In the font box, enter a value for the size your font will be, then set the margin. There is a choice of three margins left align, central align and right align. I have chosen central alignment. Lastly select the color of the text by clicking on the black color box.
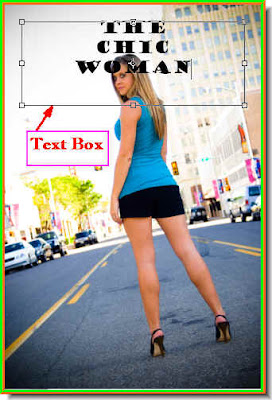
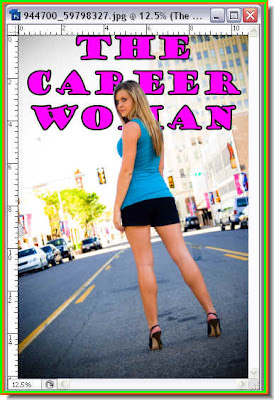
Step 5 : Draw out the text box with the cursor and type in your text. It will be the name of the magazine.
Step 6 : Now should you want to change the text, the font or the size double double click the Type layer thumbnail

Step 7 : Double clicking will highlight the text.

Step 8 : I have changed the text in the highlighted mode by typing in a different group of words for the Magazine title.

Step 9 : You can change the size of the font by entering a different value in the font size box.
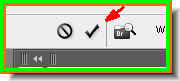
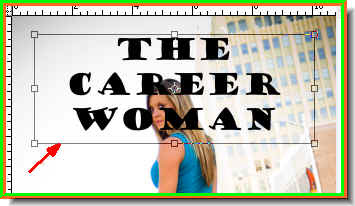
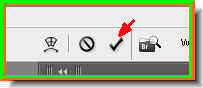
Step 10 : Click the Tick mark on the right of the top panel to commit the text once you have finalised it.
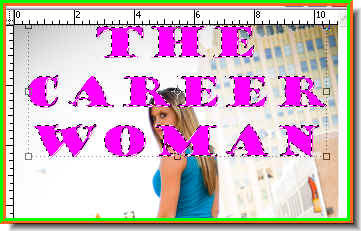
Step 11 : The text as it it now appears.
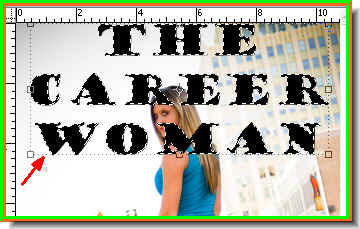
Step 12 : Press CTL+T and a selection appears around the text.
Step 13 : Press SHIFT+ALT and drag a corner handle to increase the size of the text.
If you cannot see the selection, look at the top panel. The Show Transform Controls (Bounding Box in PS7) must be unchecked. Check it.
Step 14 : Click the Tick mark to commit the text. Step 15 : Right click where the arrow points to. A popup will appear. Click on Rasterize text. Without rasterizing, text cannot be edited.
 Here is how the rasterized text looks like in the layer thumbnail of the text layer in the Layers pallette.
Step 16 : Now CTRL+Click the layer thumbnail of the text layer.
Step 17 : Ctrl+clicking the text layer thumbnail makes a selection appears around the text.
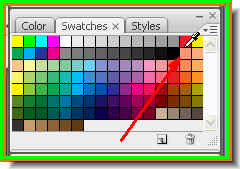
Step 18 : Click on Swatches to pick a color for the text.

Step 19 : The Swatches dialogue box opens.
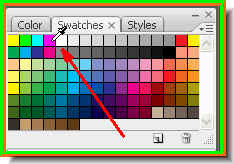
Step 20 : I have clicked on 'RGB Magenta'. If you hover your cursor over the swatches the cursor will turn into an eyedropper. Click with it to pick a color. Also hovering the cursor over a swatch reveals its name. Foe example the color I picked is 'RGB Magenta'. You can pick any color you like.
Step 21 : As soon as you click a color the foreground color becomes the same.
Step 22 : Press ALT+BACKSPACE to fill the selection with the Foreground Color which in this case is RGB Magenta. Note that the letters still have a selection around them.
Step 23 : Press CTRL+D and the selection around the letters disappear.
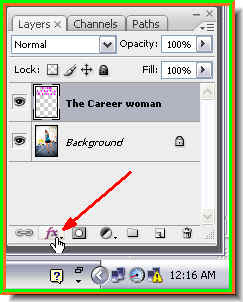
Step 24 : Click the Add Layer Style Button.
Step 25 : Click on Drop Shadow from the popup.

Step 26 : In the Drop Shadow dialogue box drag the Distance, Size and Spread sliders in that order and drag sligthly on the sliders till you are satisfied with the drop shadow effect. Do not overdo it. You can also leave it at the default settings. That too should look good enough.
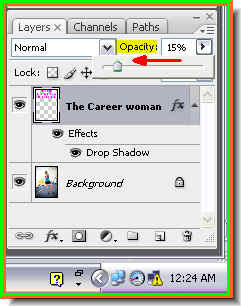
Step 27 : Notice that the layer we are working on is always highlighted. Now drag the Opacity slider down. I have dragged it down to 15 %.
The text has bccome faint because the opacity has been reduced.

Step 28 : Use the cursor to reposition the text if necessary.

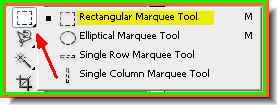
Step 29 : Click on the Zoom Tool.
Step 30 : Look at the top panel. There are two magnifying glass like icons. The one with the plus sign is to zoom in and the one with the minus sign to zoom out.
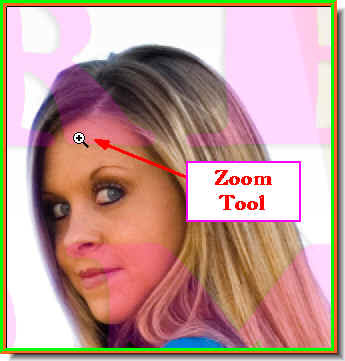
Step 31 : I have zoomed in on the image with the Zoom Tool. Step 32 : Click on the Background layer to select it. Notice that it has a small lock like icon. It means that the layer is locked, which means it cannot be edited. Now double click it.
Step 33 : This dialogue box pops up. Click ok.

Step 34 : The Background layer has changed into layer 0. The layer can now be edited.

Step 35 : Now click on the Lasso Tools and select Magnetic Lasso. Click to select it.

Step 36 : Click on the Magnetic Lasso Tool.
 Step 37 : Set the Feather in the top panel at 1 pixel. This is necessary to avoid pixellated edges.
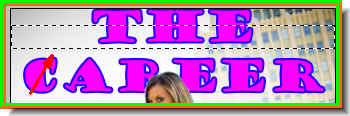
Step 38 : With the Magnetic Lasso begin to click and drag as shown above. Should you place a dot wrongly, hit delete. It will remove the last point. Then continue clicking and dragging.

Step 39 : I have clicked around the head and come back to first point I clicked. Notice that a small 'o' forms near the Magnetic Lasso when you come back to first point.
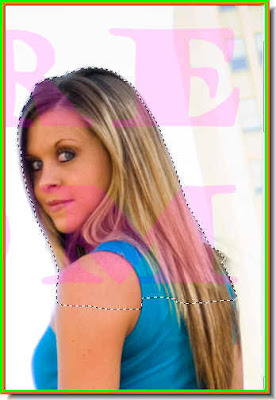
Step 40 : As soon as you click on the dot where you began clicking a selection forms. Step 41 : Now press CTRL+J and the selection is copied an pasted onto a new layer -- Layer 1. What I have cut out is part of the girl's head.
Step 42 : Now with the left mouse button pressed, drag layer 1 up above the text layer with the cursor.
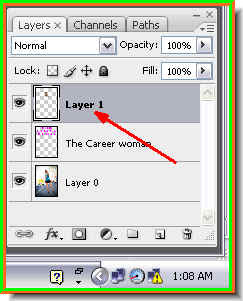
Step 43 : Layer 1 is now above the text layer.
Step 44 : The letters are now behind the girl.
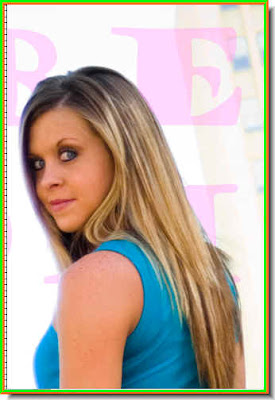
Step 45 : Now click on text layer.

Step 46 : Drag the Opacity of the layer back to 100%.

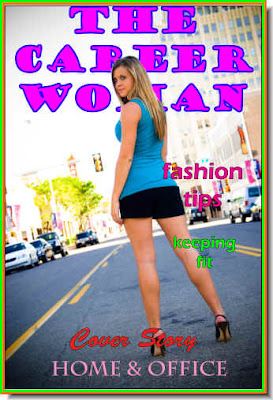
Now you can clearly make out that the text appears to be behind the girl.

This is how the 'cover' looks now.
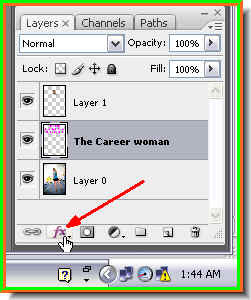
Step 47 : Click on the Add layer Style button. Step 48 : Click on Stroke from the popup.
 Step 49 : In the Stroke dialogue box click on red color box shown by the arrow.
Step 50 : Now click on the Black at the left bottom to select it. You can see 'New' at the top right changing to the selected color.

Step 51 : Now drag the Size slider towards the right. I have put it at 16 pixel. It will depend on your image.
The text with the Black Stroke applied.
You can offcourse make the Stroke any color you want. I have changed it to Blue. I think it looks better.
Add whatever other text you like using the steps described above. Use as many fonts as you like.
Step 56 : I have clicked on CYMK Red from the Swatch pallete.
Step 57 : Press ALT+BACKSPACE to fill the selection with the Red.

Step 58 : Click the Text Tool.

Step 59 : Draw out a Text Box with the cursor as shown. Type in August, 2008. Use White as the Text Color.

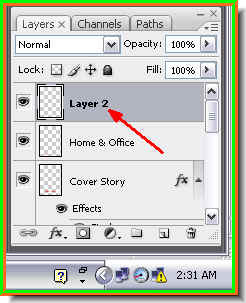
Step 60 : Press SHIFT and Click on Layer 2. This will highlight both the new text layer and Layer 2. Now press CTRL+E. This will combine the two layers into one.

Step 61 : Click the Move Tool.

Step 62 : A selection will appear. Click on a corner handle and rotate the layer and resize suitably by keeping ALT pressed as you drag the corner handles. Click the Tick Mark in the top panel as shown earlier to commit the transformation.

The Magazine Cover is complete. If you need you can download fonts from here.
No comments:
Post a Comment