 Step 6 : Use the Hand Tool to scroll the image and magnifying glass to zoom in.
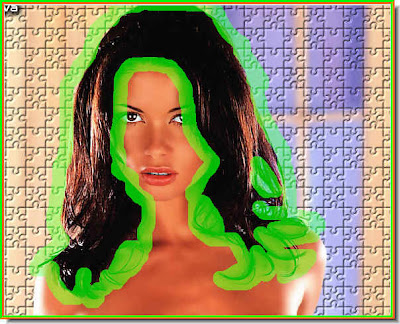
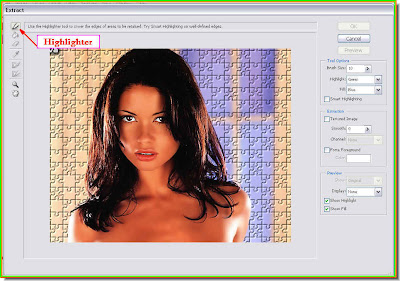
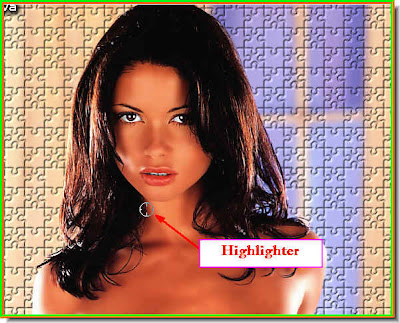
Step 7 : I have highlighted all the hair.

Step 8 : Now click the Fill Tool.

Step 9 : Position the Fill Tool on the highligted hair and click.

Step 10 : The Fill Tool fills the hair selection with a light bluish color.

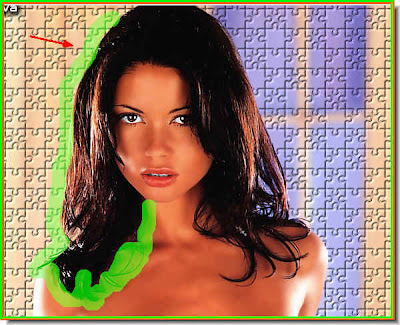
Step 11 : Click ok or hit Enter. The hair will be extracted. Step 12 : Click the Zoom Tool.
 Step 13 : Zoom in on the image. You will notice that the Extract Tool has left behind bits and pieces which will have to be removed with the Erazer Tool.
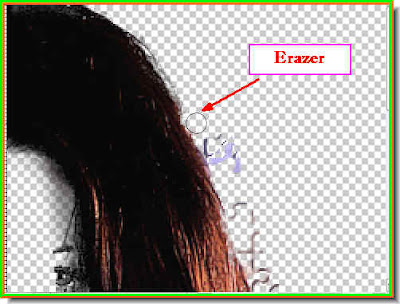
Step 14 : Click the Erazer Tool to select it.

Step 15 : I am clearing out the muck left behind with the Erazer.

Step 16 : Go carefully around the edge of the hair and eraze the bits and pieces of pixels left behind.
 Step 17 : Some more erazing to the right.
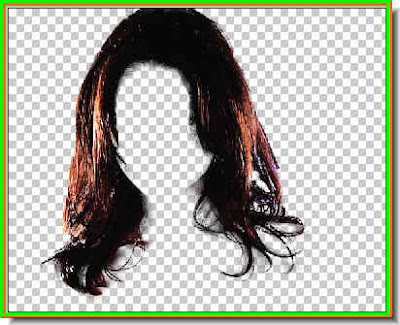
Step 18 : I have erazed all the pixel debris around the hair.
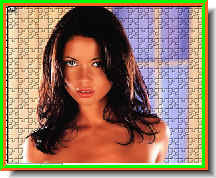
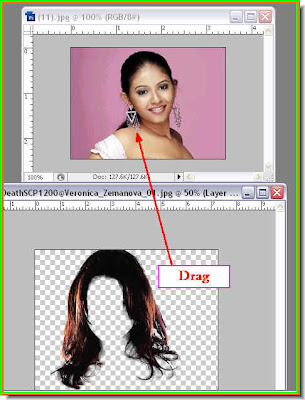 Step 19 : Now drag the extracted hair onto the other girl's image.
Drag with the Move Tool. I hope you know that.

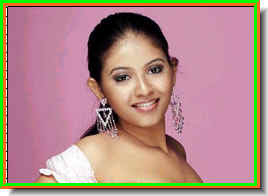
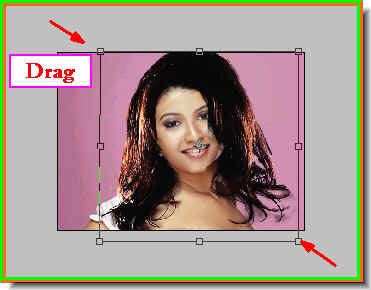
Step 20 : The extracted hair has landed on the other photo, but it appears too large.

Step 21 : Press ALT and drag a corner handle downwards diagonally.

Step 22 : If you cannot see the selection, it is because the Show Transform Controls (Bounding Box in Photoshop 7) is unchecked. Check it.
 Step 23 : Press ALT and drag diagonally to resize the hair to fit. But sometimes it does not as is the case here.
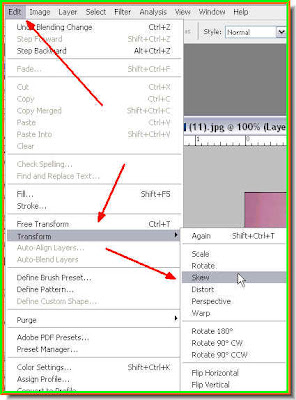 Step 24 : Go to Edit>Transform>Skew.
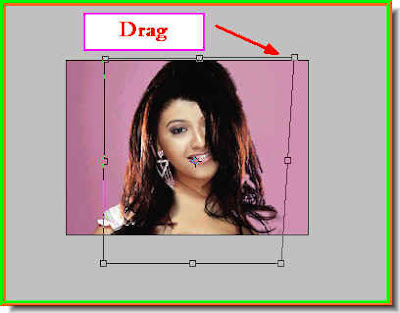
Step 25 : Drag the corner handles again to resize.

Step 26 : Press CTRL+T and again resize with the corner handles.
 The hair now fits better.
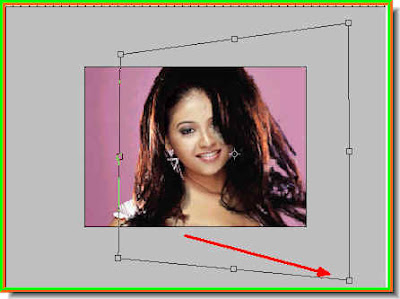
Step 27. Again presing CTRL+T, I have again tweaked the bottom right corner handle. You must remember that each image will need different tweaks, but if you follow these steps you will be able to make the hair fit. Press Enter to commit the transformation.
This is how the image looks. Not exactly right though.

Step 28 : Click the Add Layer Mask button and a Layer Mask forms next to the layer thumbnail on Layer 1.
Step 29 : Click the Brush Tool.

Step 30 : Make sure the Foreground Color is set to Black. If it is not press X then D on the keyboard to set it back to the default.
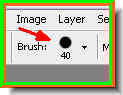 A word about the Brush Tool. To make the tip larger use the right ] key, to make it smaller use the left ] key. To soften the brush press SHIFT+[ and to make it hard press SHIFT+] key. The brush is set to a hard tip. See on the top panel at left.
I have now set the brush to a soft tip. Note that the size of the brush which is set at 40 does not alter when you change from hard to soft tip.
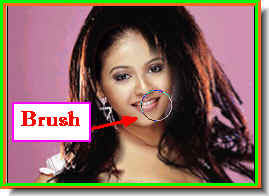
Step 31 : With brush tip now soft I am brushing away the hair from the eyes to reveal it.
Step 32 : I am also using the brush on the right to shape the hair.

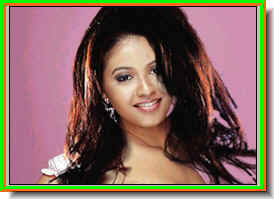
I have also brushed away the hair on the shoulder. Now the hair fits perfectly. That is all.
No comments:
Post a Comment