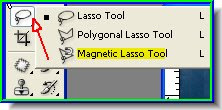
Step 2 : Click the Magnetic Lasso to select it.
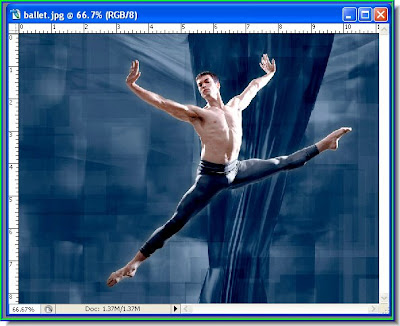
Step 3 : Click and drag with the Magnetic Lasso to select.

Step 4 : The selecting process has been completed.

Step 5 : The selection is complete. A column of 'marching ants' now surround it. Step 6 : Press ALT+CTRL+D on the keyboard and the Feather Selection dialogue box appears. Put 1 pixel as the radius. This is being done to soften the edges of the selection.
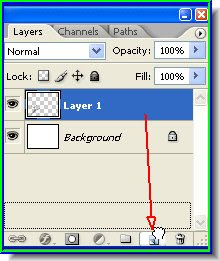
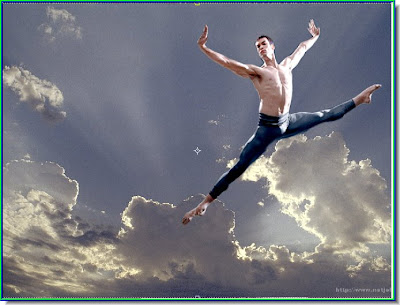
Step 7 : Press CTRL+J on the keyboard and the selection willbe copied and pasted to a new layer i.e. Layer 1. Now click off the eye icon on the Background layer. The selected figure will now appear against a transparent background.
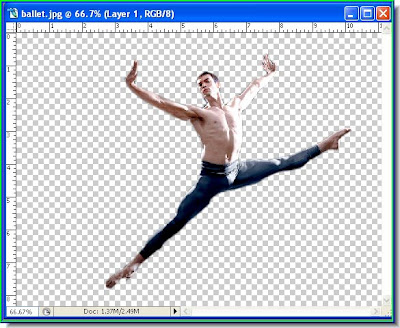
Step 7 : The selcted figue against a transparent background.
 Step 8 : Open a new white Layer and use the Move tool to drag it onto it while keeping the SHIFT key pressed. This will make the figure of the man land exactly in the middle of the new white layer.
The Move Tool is located on the top left panel. Step 9 : The man's figure has landed in the middle of the white layer.
 Step 10 : Keeping the ALT key pressed use the Move Tool to resize the image. Keeping the ALT pressed will keep the man's image proportional.
Step 11 : Click the Move Tool or any other tool and this dialogue box appears to apply the transformation. Click Apply.
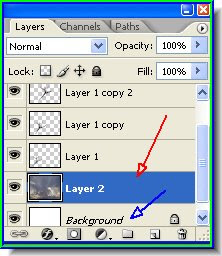
Step 12 : Drag Layer 1 to the new layer icon as shown.
Step 13 : A Layer 1 copy forms.
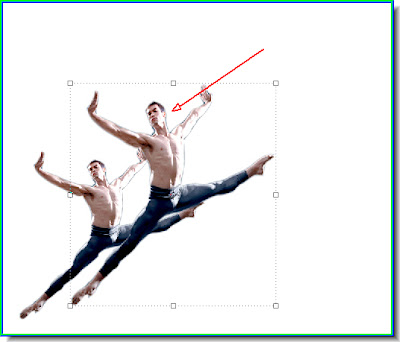
Step 14 : Use the Move tool to first move the Layer 1 copy. Then press ALT and resize to make the second figure slightly larger. To resize drag by the corner handles while keeping ALT pressed. Step 15 : Now drag Layer 1 copy to the new layer icon and a Layer 1 copy 2 forms.
 Step 16 : Now use the Move tool again to move the third copy of the figure. Then keeping Alt pressed resize to make this figure slightly larger than the last one. Lastly click the Move Tool to Apply The Transformation.
Step 17 : Now drag the Layer 1 copy 2 to the new layer button and a Layer 1 copy 3 forms.

Step 18 : Now use the Move Tool again to move the fourth copy of the figure. Press ALT and resize. Then click the Move Tool and apply the transformation. Four figures have been created from a single image. You can make any number.
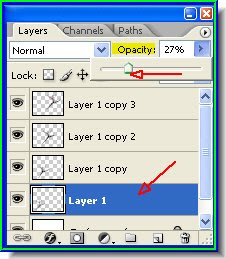
Step 19 : Now click on Layer 1 which contains the first figure to select it. Then drag the Opacity slider to the left to reduce the opacity. I have reduced it to 27 %. There is no hard and fast rule. It will depend on the effect you want.
Step 20 : The image with the opacity of the first figure lowered.
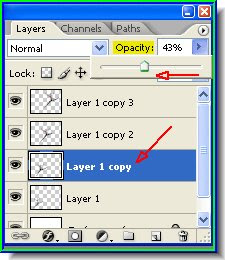
Step 21 : Now click on LAyer 1 copy and reduce the opacity of this layer. I have reduced the opacity to 43 %.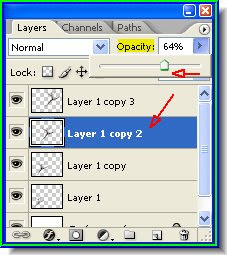 Step 22 : Now I have clicked on Layer 1 copy 2 and lowered the opacity to 64 %.
 Step 23 : The image now looks like this. I have not changed the opacity of the last layer and it remains at 100 %.
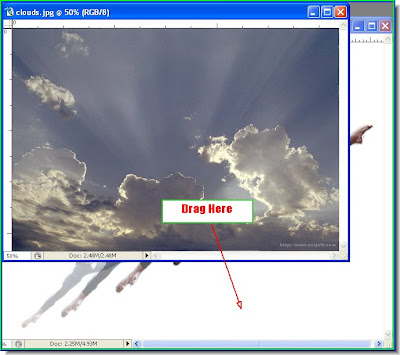
Step 24 : I have opened this image of clouds. I will now drag it to the white layer. Keep the SHIFT key pressed while dragging.
Step 25 : This is how my image looks like.
Step 26 : I have now dragged the clouds layer to just above the white Background layer.
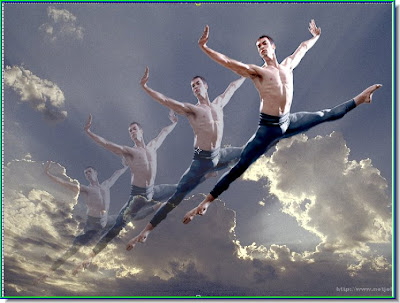
This is how the finished image looks like. That is all. Easy was it now?
No comments:
Post a Comment