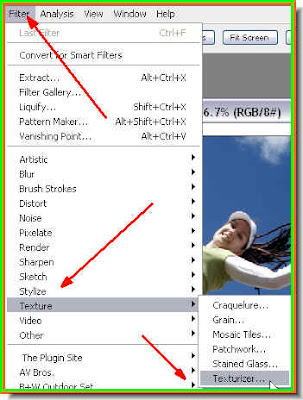
Step 1 : Go to Filter>Texture>Texturiser to access the Texture filters.
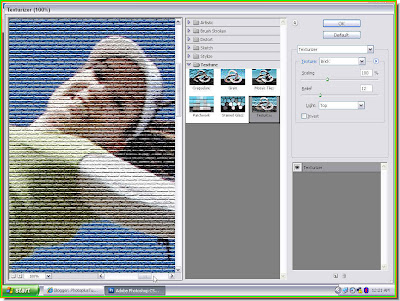
Step 2 : The Texturiser dialogue box opens. The controls are on the right side of the Texturiser dialogue box.
 Step 3 : These are the default Textures available is you click where the red arrow points to. But there are many more textures that you can use on your images. These have to be loaded.
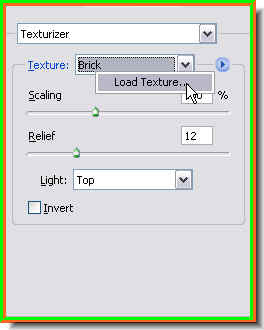
Step 4 : Click where the white arrow points to. It will reveal the 'Load Texture' dialogue.
Step 5 : Click the Load Texture. Step 6 : Navigate to the C drive on your computer.
 Step 7 : Click on Programme Files.
Step 8 : Now click on Adobe.
 Step 9 : Now Click on Adobe Photoshop CS.
Step 10 : Now click on Presets.
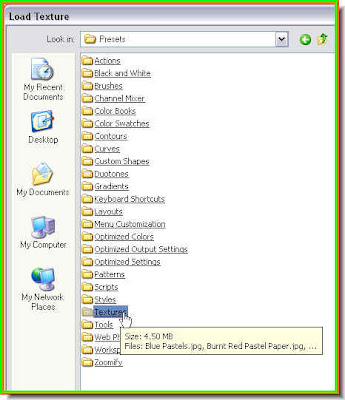
Step 11 : Now click on Textures. Step 12 : The Textures are revealed. Click on any one to load it into Photoshop.
Step 13 : I am clicking on Snake Skin.
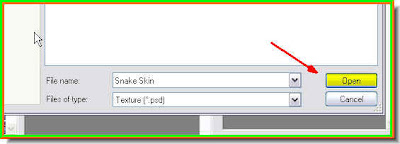
Step 14 : Click on the Open at the bottom as shown to load the texture in Phooshop.
Step 15 : Now when you click the Texturiser, Snake skin appears in the drop down menu. Let us apply it.

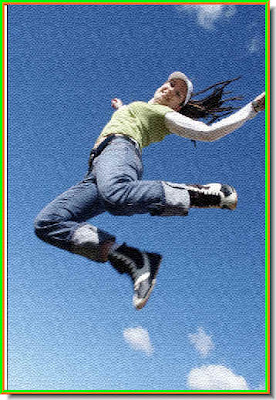
Step 16 : I have opened this photo to apply the texturiser to. Step 17 : Open the Texturiser dialogue box by going to Filter>Texture>Texturiser as shown in Step 1.
Step 18 : Now you will find the Snake Skin Texture from the drop down menu.

Step 19 : There are other controls also. The Scaling and Relief are to increase or decrease the size of the texture. You can also change the Light. It is set to Top as default. Click it to change the direction of light on the texture from the drop down menu. You can also check Invert to ivert the texture. I am leaving it unchecked.
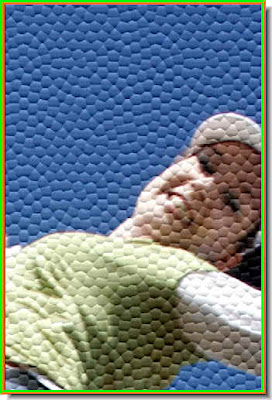
Step 20 : The Snake Skin Texture has been applied as you see in the closeup of the photo at the bottom.
Step 21 : Now I am choosing the Puzzle Texture.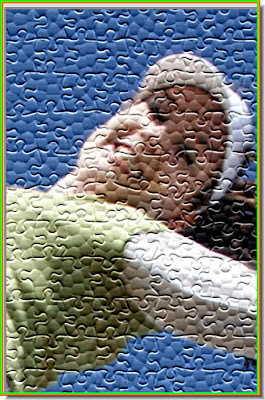
The Puzzle texture applied. Load all the Textures and have fun!
No comments:
Post a Comment