
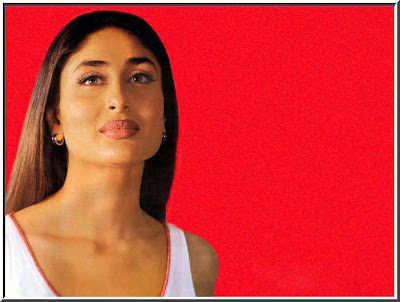
Make an image appear inside another. Here Bollywood actress Kareena Kapoor appears inside the pupil of the eye. It is simple to do. Here is the tutorial.
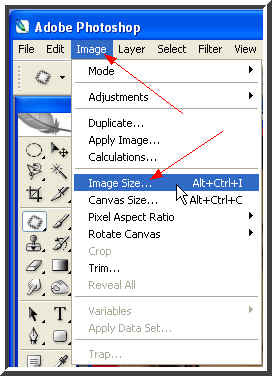
Step 2 : Go to Image>Image Size as I have done above.
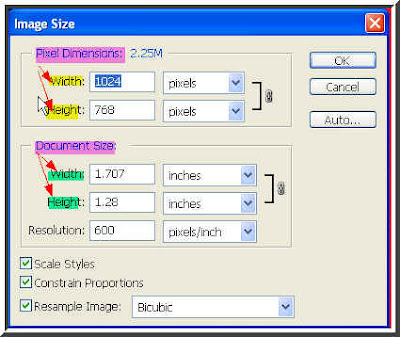
Step 3 : The Image Size dialogue box opens. There are two parts -- Pixel Dimension and Document Size (highlighted in mauve). The Width and Size of Pixel Dimension and Document size are given (highlighted in yellow and green). The Resolution is 600 pixels/inch. Not very illuminating I suppose. But do not fear it not difficult to understand. Allow me to demonstrate.
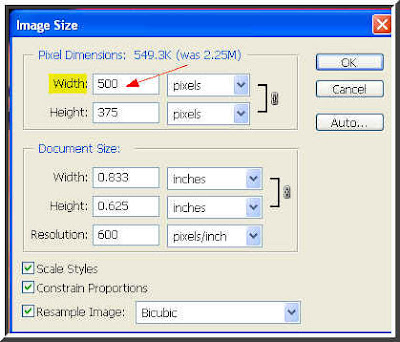
Step 4 : I have changed the width here to 500 pixels. All the other parameters change automatically.
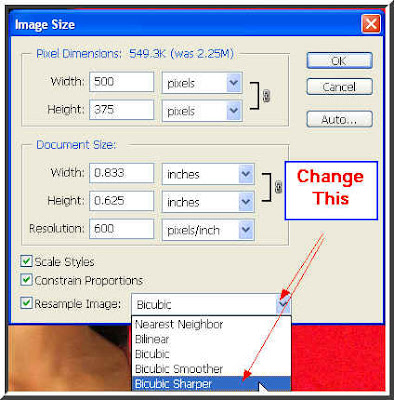
Step 5 : Now from the drop down box at the bottom choose Bicubic Sharper. Click ok. (This option is not available in PS 7).
Step 6 : This is the photo after resizing. Does not seem the worse for it either. Now for PS 7 users. It can be done in another way, which can also be followed by PS CS 2 users.
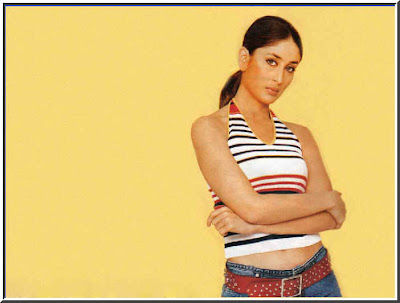
Step 1 : I have opened another image of Kareena Kapoor. I will demonstrate another way of reducing file size.
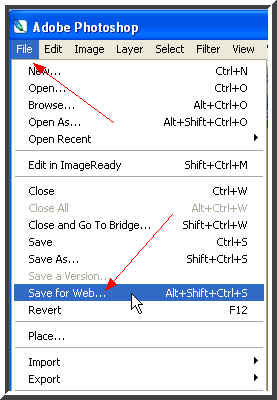
Step 2 : Go to File>Save for Web.
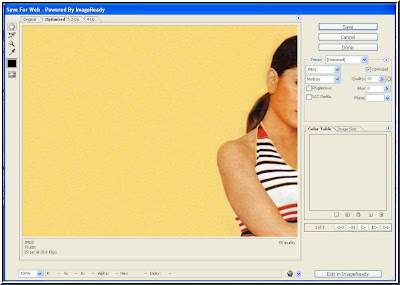
Step 3 : This dialogue box opens.
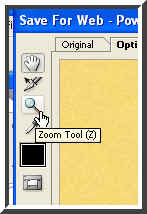
Step 4 : Look at where the Zoom Tool is located and also the hand tool just above it.
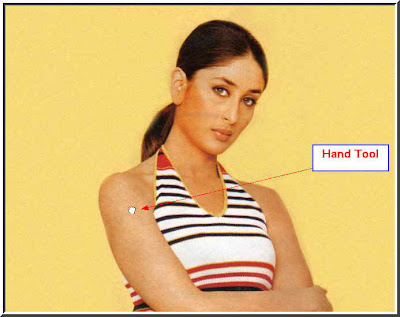
Step 5 : With the Hand Tool drag the figure into view if it is not visible.
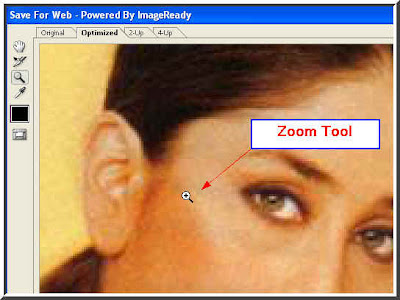
Step 6 : Now use the Zoom Tool to zoom in on the image.
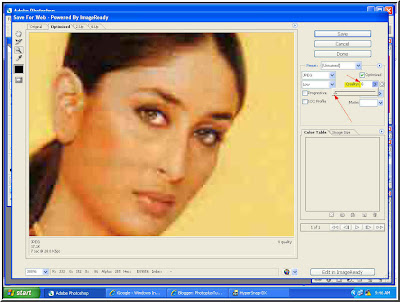
Step 7 : Now look at the top right hand corner of the dialogue box. You will find 'Quality' (highlighted in yellow). Click beneath it and you will find a slider. Drag it to zero.

Here is a closer look. The 'Quality' has been reduced to zero.
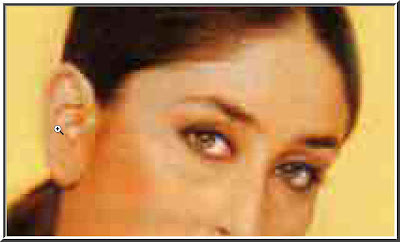
Step 8 : You can see that reducing the 'Quality' to zero has made the photo blotchy with the pixels showing.
Step 9 : Now slowly increase the 'Quality' by dragging the slider to the right till the blotches disappear.

Step 10 : You can also change the Preset from the dropdown box and choose a setting between Jpeg High to Jpeg Medium. You should set the Preset to Jpeg. This is important. Now click Save.
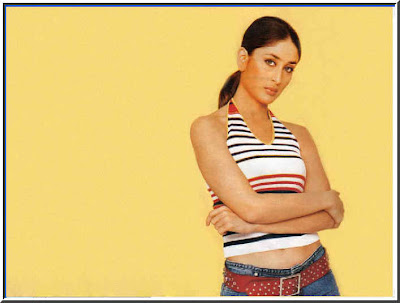
Your photo has been resized and can posted on the web. That is all.
 Here is a trick to retain color selectively in Photoshop while reducing the rest to greyscale. It is a favourite with illustrators. There are many ways of doing it. But here is an easy way.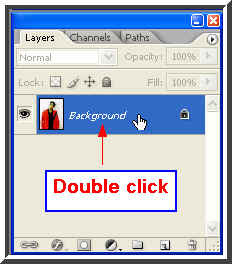
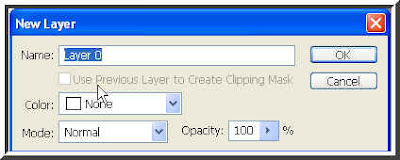
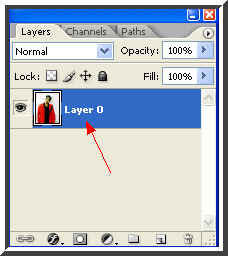
Step 3 : Notice that the 'Background' has changed into 'Layer 0'. I did it to make the layer editable. The Background layer cannot be edited.
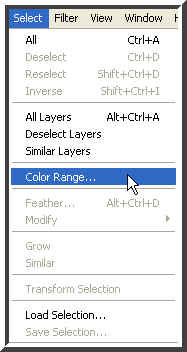
Step 4 : Go to Select>Color Range.
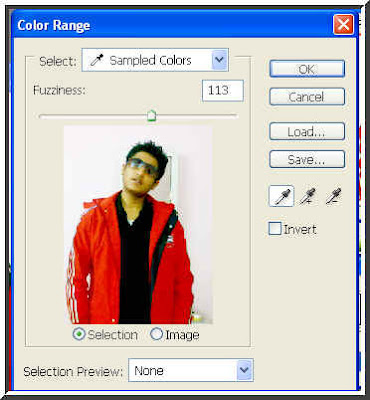
Step 5 : The Color Range dialogue box opens. Make sure 'Selection is selected. Though the image is visible here, it will not show up when you click the dialogue box. It will apear in black and white.
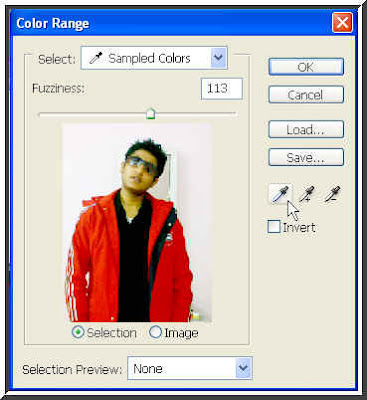
Step 6 : Click the 'eyedropper' shown by the white arrow and click on red jacket in the photo.
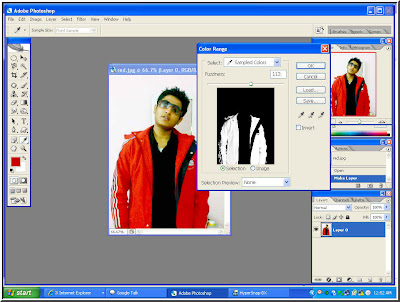
Step 7 : When you click the red jacket, look at the Color Range. The white portion is the jacket. Click ok.
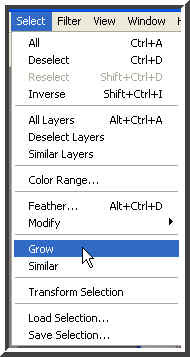
Step 8 : Go to Select>Grow. For this image this is all that is necessary. For some images you may have to click Grow a number of times as well as 'Similar' just below it to complete the selection.
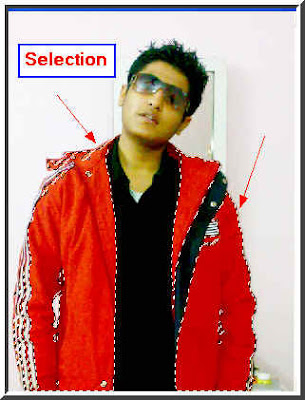
Step 9 : The entire red jacket has been selected. The 'marching ants' is the selection.
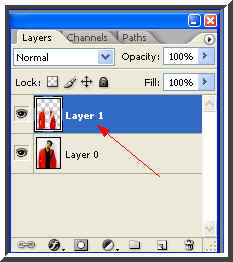
Step 10 : Press CTRL+J on your computer. The red selection will be copied into another layer with a transparent background. See Layer 1 (red arrow).
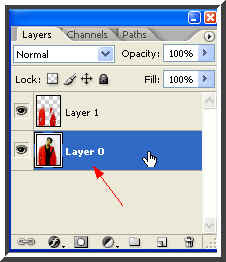
Step 11 : Remember you were working on Layer 0. Click back on Layer 0 to select it (red arrow).
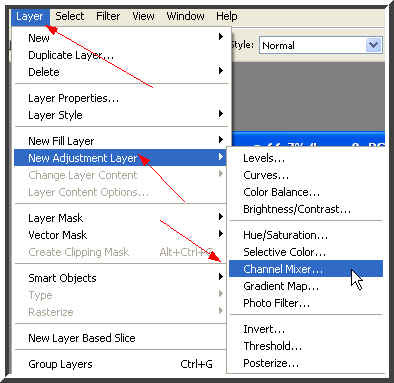
Step 12 : Go to Layer>New Adjustment Layer>Channel mixer.
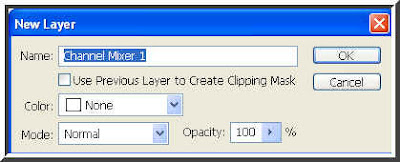
Step 13 : This dialogue box opens. Click ok.
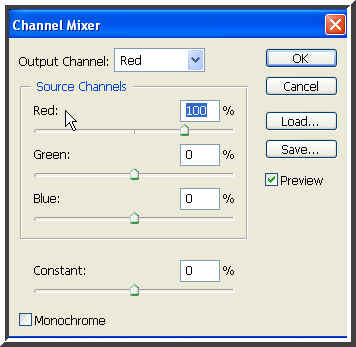
Step 14 : Now the Channel Mixer dialogue box opens.

Step 15 : In the Channel Mixer dialogue box first check 'Monochrome' (highlighted in blue). Now drag the Red, Green and Blue sliders a little at a time to make the black and white prominent and have good contrast. Drag the 'Constant' slider slightly or you may not need to use it at all. Now click ok.
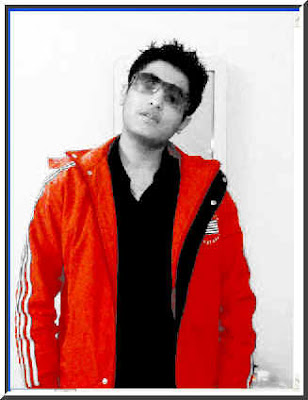
And there you are. Go to Layer>Flatten Image. Then go to File>Save as. Save as Jpeg.
You might be interested in another tutorial here that also follows some of the steps here for another effect. Click here.


